Tuesday 28 February 2012

Stoneware Naan Bread (easily dairy free/Vegan)

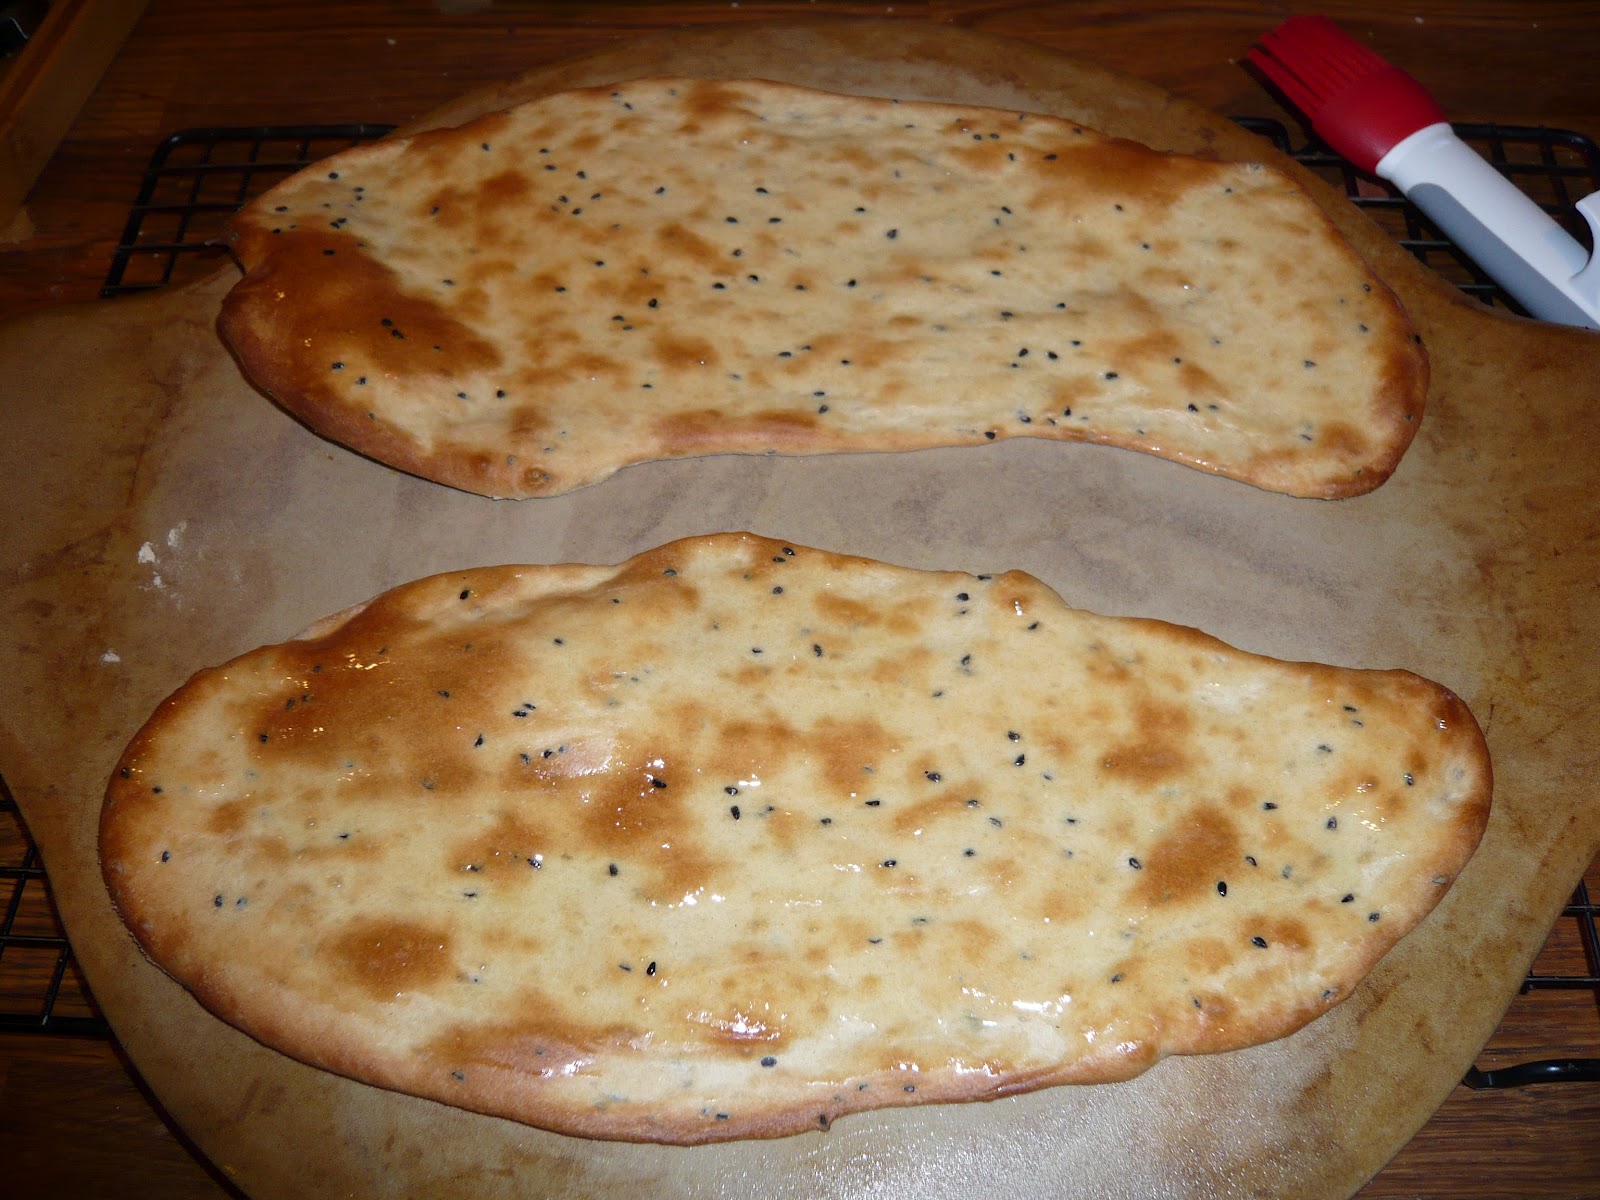
 Naan Bread (vegan) on the Medium Round Stone with a cameo by the silicone basting brush!!
BREAD WEEK RECIPE 2

My naan breads have evolved over the past year and I now use this recipe all the time rather than buying them from the supermarket.  You have to plan ahead a little but they are absolutely no trouble and very quick to rustle up.

You NEED a naan bread with curry don't you?  I promise a couple of quick curry recipes next week!

I developed this because I'm lazy and really you don't need to be kneading away too much with this! These can be egg and dairy free and therefore vegan, and I'm still working on a gluten free one - nearly got there tonight!


Ingredients

1 tsp dried active yeast (not the fast action or easy bake stuff)
3/4 cup lukewarm water
2 cups plain flour
1 tsp salt
1 tsp sugar
2 tsp onion seeds (sometimes called nigella seeds)
1 pinch bicarbonate of soda
2 tablespoons of oil
2 1/2 tablespoons plain yoghurt (I use Alpro soya yoghurt in plain to make this vegan/dairy free)


Olive oil (or melted butter if you aren't vegan) for brushing once cooked
Flour for rolling out

Method

1. Dissolve the yeast in the water and let it sit for about 5-10 mins while you get everything else all organised. It should be a little foamy by the time you use it.

2. Put the flour in a classic batter bowl and add the salt, sugar, onion seeds, bicarbonate of soda, oil and yoghurt with an adjustable measuring spoon.

3. Mix with a Mix n scraper to get a crumbly dough.  Then add the yeast mixture and use the scraper and then your hands to mix it into a soft dough in the bowl.  Squidge it around for a minute until it comes together nicely.

4.  Put the lid on the batter bowl (or clingfilm if using another bowl) and leave to sit for about 2-3 hours to double in volume.

5.  Put your oven on to 220°C and then knead the dough for a minute or two on a flexible cutting mat.

6. Divide the dough into 4-6 pieces and then using as little flour as possible and a baker's roller, roll the dough out into ovals on a medium round stone, rectangle stone or medium bar pan.

7. Brush with a little water, and put in the oven for about 10-15 minutes depending on how golden you like your naan.

8.  Remove and cool on a stackable cooling rack and brush with olive oil using a silicone basting brush.  If doing in a couple of batches let the stone cool a little before putting the next batch on it to prevent thermal shock and let the oven heat up again.

Mop up your curry with it or dip it in salsa!

Monday 27 February 2012

Bread Rolls in the Stoneware Muffin Pan

I've just looked at the blog and realised there is nothing on here that is savoury!  That should give you an idea about my leanings shouldn't it? 

So we are going to rectify that with BREAD WEEK!
 
To start off with, here are some lovely bread rolls done in the stoneware 12 cup muffin pan. 

These would work on any stone if you just shape them into rolls, and makes a lovely crusty loaf if divided in two and shaped to fit the medium bar pan or bakers.  I promise to post a recipe soon for Stoneware bread for the best sized loaf for a loaf pan!


Ingredients
600g White Bread Flour
1 1/2 tsp fast action yeast
2 tsp sugar
1 1/2 tsp salt
3 tbsp olive oil
380ml warm water

Method
1. Put the flour in a classic batter bowl. Add salt, sugar, yeast and stir. 

2. Add the oil and then the water gradually to make a soft dough.

3. Knead well on a lightly floured surface for 5 minutes until the dough is smooth and elastic (or bung it in a mixer with a dough hook if you have one!)

4. Put the dough back in the bowl and cover with lightly oiled cling film (or put on the lid) for 45 mins or until double the size.

5. Heat the oven to 200°C.

6. Tip the dough out onto a lightly floured surface, knead for a minute and then divide into twelve even sized pieces.

7. Grease the sides of the stoneware muffin pan lightly with oil and put a piece of dough in each one.  You can try making tear apart rolls which are three or four small pieces of dough put in the one cup together.  They make a nice little pattern on top of the rolls (see my picture with an example of one of each on the left) and they can be torn apart easily and dipped in oils or buttered.

8. Leave to rise for as long as you can bear up to 30 mins - I usually manage about 15 mins while my oven heats up!

9. Bake for about 20-25 mins till golden brown and they make a hollow sound when tapped on top.

10. Leave to cool in the muffin pan for about 5 mins then remove to cooling rack.

11. Eat warm, plain, smothered in butter, dipped in garlic butter or olive oil and balsamic or anything else you fancy! YUM!

Please be careful as the stoneware retains a lot of heat and can still burn after the 5 mins cooling time.  Use oven gloves!

Saturday 25 February 2012

Alternative Uses for a Trifle Bowl

This is a beautiful idea from my fellow Pampered Chef Consultant Leonie Wood.


How gorgeous is this?

All you need is a fabulous trifle bowl, some daffodils and 9 lemons and 9 limes. The daffodils are supported by the little cup out of the measure all cup in the middle.

The beauty of the trifle bowl is that it comes apart and the stand on the bottom can be put inside it for storage.  It also comes with a plastic lid to seal it for transportation to parties!  Or for putting it in the fridge when there is some left over - very unlikely!

If you want to have a look at some more ideas for what to do with a Pampered Chef trifle bowl, come and have a look at my Facebook pages photo album Trifle Bowl Ideas

Tuesday 21 February 2012

Banana cakes (Egg free, dairy free and gluten free!!)


This is a little post for some of my friends I know are unable to indulge in the usual way due to allergies and intolerances.  It can be so difficult not to be able to eat a cake at the same time as everyone else, or to have to think about where everything that you put in your mouth came from.  You have to be highly organised and able to put up with not eating while you watch others enjoying food around you.  I'm becoming a bit of a specialist in catering for the out there requirements, and this is one of my fail safe recipes that can be used for almost anyone with allergies.  


Not gluten free?  Then it works just as well with ordinary self raising, and you don't need eggs or butter either!  Bonus!


Dieting?  There's about 145 cals in one cake (12 bun tin) and 6g fat but the fat is all the oil so hardly any saturated fat at all!

Naked banana cakes cooling down!


Ingredients

120g sugar
80ml sunflower or vegetable oil
½ ripe banana
150g gluten free self raising flour
6 tbsp water

Method

Preheat the oven to 170°C

1.  Beat oil and sugar together in a classic batter bowl with a mix n scraper.
2.  Mash the half banana and beat into sugar mixture. 
3.  Add flour and water and mix well.  The consistency should be like a normal cake batter.  If not add a little more water.
4.  Fill a 12 cup muffin pan with paper liners or a 24 cup mini muffin pan and divide the mixture between the papers.
5.  Cook for about 12 to 15 minutes, then remove from the oven and cool on a cooling rack.
6.  Ice with icing made with pure spread and icing sugar or water icing.  You  could use our lovely decorator bottle set to make them look pretty!  Or how about a dairy free chocolate button on the top of a mini one before it cools down completely so the button melts a bit - yummy!

To make this into a big cake just double the mixture and split between two 8inch cake tins.  Sandwich together with jam and ice as above.


Tip: Don't know what to do with half a banana? Eat it or stick it in the freezer for next time! It looks pretty yucky because the skin goes black but it works brilliantly in cakes. I always bung my slightly past it bananas in the freezer to use at a later date if I'm not baking at the time. Not often, but it does happen.


Based on a recipe from Doves Farm flours

Tuesday 14 February 2012

The pancakes we'll be eating on pancake day...


Don't tell me these don't look good!
Fluffy egg and dairy free pancakes and my mum's home made raspberry jam
I have to say pancake day in our house the last few years has been a bit of a non event.  Why?  Because my youngest is allergic to eggs and dairy.  You can't have pancakes without those can you?  Er...well...yes!  I've fiddled with recipes over many a month and I've definitely got it cracked!

I make these in my Pampered Chef Square Griddle Pan which I got free when I first hosted a show before becoming a consultant.  Hosts really do get amazing bonuses!

We eat scotch pancakes, or drop scones if you prefer, most weekends for breakfast and I love the ritual of mixing and flipping, and the family love the ritual of spreading with jam, honey, chocolate spread or a combination, and eating.  This is also one of my secret weapons for kids parties - they go down a treat and at a recent one I challenged the adults to try them and tell me what was different.  They couldn't!

So no eggs in the house this pancake day?  No problem! Feel free to use cow's milk instead of soya, although you may then want to add a tiny touch of vanilla essence as soya milks generally have this added already.


Ingredients

1 cup plain flour
1 cup soya milk (plus a little extra to adjust consistency)
2 tbsp sugar
2 tbsp vegetable oil
1 heaped tbsp baking powder

The baking powder seems a lot but you honestly can't taste it and its what makes them magically rise!

Method

1. Measure your ingredients out using the easy read measuring cups and adjustable measuring spoon into a small batter bowl.
2. Using the stainless whisk start gently in the middle and begin to whisk all ingredients together taking more gradually from the sides.  Can't be bothered with this?  Just whisk like mad till smooth!  A few lumps don't matter. The consistency should be of thick cream. Add a little more milk if need be.

3. Pour a small amount of oil onto kitchen paper and use it to wipe the surface of the square griddle pan.  Then heat and pour the first few drops of batter to make several pancakes straight from the batter bowl.  I tend to do four at a time, bigger single ones if its for the hubby.


4.  When the pancakes are bubbling away and beginning to look set on top, flip over with a slotted turner and cook for another minute till golden brown on the bottom.  Continue till the mix is finished.  Sometimes you may need to add a little more milk and re-whisk half way through as the flour absorbs the liquid and the mix thickens.

Serve warm with as many toppings as you can think of or with butter and jam like your granny would have. Bacon and maple syrup?  Apple compote?  Mixed fruit salad?  Whipped cream?

Monday 13 February 2012

Marshmallow Hearts

Its Valentine's Day tomorrow and I nearly forgot.  Oops!  Had a moment in the kitchen this afternoon and dreamed these babies up.  Yum!  (There are only two left to photograph!)
This is based on my basic biscuit mix that I use when I need a biscuit for cutting into amazing shapes and icing for various child friendly events.  I like it because its fast and no fuss but also easy to convert to dairy free with the addition of Pure spread rather than butter, and it works quite well with gluten free flour too (omit the cornflour and add extra gluten free).
The biscuits work so well on Pampered Chef stoneware as they cook evenly and are lovely and crisp once they cool.

The last two hearts left!

Makes about 18-20

Ingredients for biscuits
150g butter
90g caster sugar
180g plain flour
60g cornflour
pinch of salt

Filling
10 Marshmallows
Strawberry Jam

Method
1.  Preheat the oven to 160°C
2.  Cream the sugar and butter together till soft in a Classic Batter Bowl using a Bamboo spoon.
3.  Add the flour, cornflour and salt and mix together to form a soft dough.
4.  Roll out on a flexible cutting mat sprinkled with flour with the Baker's Roller to about the thickness of a pound coin.
5.  Cut out heart shapes, re-rolling as necessary.  This should give you round about 40 hearts depending on the size of cutter (mine is about 5cm high).
6.  Bake on stoneware medium bar pans or medium round stones for around 18mins.  You don't want them to be going too brown, just turning a tiny bit golden.
7.  Remove half of the biscuits from the trays and cool on a stackable cooling rack.
8.  Cut the marshmallows in half and put a cut half on top of the remaining biscuits.  Put these back in the oven for about a minute until the marshmallow begins to melt.  Watch out here as it can go very runny if you leave it too long.
9.  Spread the cooling biscuits with a little strawberry jam and sandwich them together with a marshmallow covered biscuit.  Wait for them to cool a little before serving or it gets very messy!!


(c) Kristina Robb 2012

Saturday 11 February 2012

Chocolate and Banana Bread (Egg and Dairy free, Vegan) and very LOW FAT!

So here is my very favourite banana bread.  Why dairy and egg free?  My littlest person's diet is both of these as she has had allergies from birth.  It makes baking interesting, but I've found lots of alternatives and I challenge you to find anyone who can guess this is dairy and egg free when you feed it to them!

Thanks to HCampbell Photography for taking the pretty photo for me!

Ingredients

3 very ripe bananas
3/4 cup sugar
1/3 cup soya milk (or cows milk works fine too if you don't need to worry about dairy)
2 tbsp vegetable oil
1 tsp pure vanilla extract
1 1/2 cups plain flour
3/4 tsp bicarbonate of soda
1/4 tsp salt
3 tbsp cocoa powder
6 tbsp boiling water

Method


Preheat the oven to 180°C

1. Mash the banana in a classic batter bowl.
2. Beat in the sugar, milk, oil, and vanilla.
3. Add the flour, bicarbonate of soda and salt and gently mix.
4. Mix the cocoa powder with the boiling water in a small prep bowl and stir well until the chocolate is dissolved.
5. Add the chocolate to the mix in the batter bowl and mix gently.
6. Bake in the stoneware loaf pan for 55mins.
7. Remove from the oven and leave to cool in the tin for about 5 minutes before tipping out onto a cooling rack to cool.

Wait to cut into it as the warmer it is, the squishier it is! Bet you can't wait long!

TIP:  If you would like it to look nice and swirly like in my picture then divide the mix into two bowls after stage 3. Then add 4 tbsps of hot water to the chocolate and mix it into one of the bowls.  Add 2 tbsps water to the other bowl and mix.  Then add the mixture to the tin or loaf pan alternating between the chocolate mix and the banana mix and swirl with a knife before cooking as above.

The Stoneware Loaf Pan is the same size as a 2lb loaf tin.

Based on Isa Chandra's recipe for banana bread from Post Punk Kitchen (AMAZING Vegan food!)
http://www.theppk.com/

1st August 2012 Update

Inspired by Jo Wheatley on her facebook page yesterday I tried a zebra cake with the above recipe.  It turned out pretty well don't you think?  I used an 8inch (20cm) springform cake tin and simply followed the recipe above, splitting the mix into the two colours.  I then put three spoonfuls of each mix alternating in the middle of the tin.  The mix spreads out as you add the next layer and when its cooked it then looks like this:


I'm off to try it with a whole load of other recipes....

There is a great tutorial on how to do this here from Melissa at My cake school, if you want it.


Tuesday 7 February 2012

Cherry Scones

I made my little girl's birthday cakes this evening in preparation for Thursday.  Yes it does say cakes - there will be three! One for nursery, one for her birthday tea at home and one yet to be created for the party on Sunday when she has decided she wants a Barbie cake.  
On finishing and popping them in the oven I then realised there was nothing to show for my efforts to eat this evening! So I whipped up some scones too.  And here they are.  This is the recipe I have been using for ages and which makes light fluffy scones.  No egg as my little one has egg allergies and I make them with soya milk and vegan spread too.  So could you, if you want them to be vegan.

Tonight I tried out a tip I got from a fellow Pampered Chef consultant about using the Mix n Masher to rub in the butter rather than get my hands dirty!  Oh my goodness the revelation is amazing!  Not only does it make the most amazing mash but it does this job super quick.  And the scones were gorgeous too!

Ingredients

225g self raising flour
1 teaspoon baking powder
1/8 tsp salt (a pinch!)
2 teaspoons sugar
70g butter
150 ml milk
50g chopped glace cherries or sultanas, raisins etc

Method
Preheat the oven to 220°C

1.   Sift flour, baking powder and salt together in a classic batter bowl.
2.   Stir in sugar
3.   Use a Mix N Masher to "rub in" the butter till it resembles breadcrumbs (or use your fingers if you don't have one!)
4.   Add the cherries or other mixed fruit and stir.
5.   Make a well in the centre and slowly add the milk, (you may not need the full amount) mixing everything together gently with a mix n scraper.  The dough should be soft but not sticky.
6.   Pat the dough out gently on a floured surface to about 2.5cms (1inch) thick and cut into scones.
7.   Cook on a round stone or medium bar pan at the top of the oven for around 12-15 mins till golden brown. Cool on a wire rack and eat warm!

Thursday 2 February 2012

Welcome to my New Blog!

Hello and welcome to my new blog!

This is a sneak peek into what is happening in the house of a Pampered Chef consultant at mealtimes and will give you lots of ideas for using the wonderful Pampered Chef equipment in your own home.  I'm not a chef, but a wife and mother who has to cook to feed her family.  However, I do love a bit of quiet time in the kitchen when I get the chance and I love to play!

All my recipes include direct links to my website if you wish to go and have a look at the products direct or make a purchase, and you can always contact me if you would like more information.

I'd love to hear your comments about the recipes or Pampered Chef equipment, and I always like photos of other people's creations.

Kristina x