Showing posts with label mix n scraper. Show all posts

Sunday, 28 April 2013

Raspberry Mallow Crispies (egg, dairy, gluten, soya and nut free)

Mallow crispies in a Pampered Chef Petite bamboo bowl
These yummy Mallow Crispies make a great allergy friendly party food.

I love this recipe - it is the ultimate in children's party food for those with allergies as you can make it free of the big four and no-one is any the wiser.  I came across it as I was wading through many different recipe books at the beginning of my allergy mum journey, and I fixed on it as simple and easy and fitting our requirements of no egg, dairy or wheat at the time.  I had almost forgotten about it in the experimentation with cakes and biscuits, but I came across some marshmallows at the back of my cupboard yesterday and I suddenly remembered about it.

The recipe comes from Alice Sherwood's Allergy-Free Cookbook, which covers a multitude of allergies but always annoys me in the difficulty of having to swap in different things depending on the allergy, as I have to do at least two and it gets complicated!  However, don't let that put you off, as some of the recipes are great.

If you are making it gluten free, make sure your crispies are free from barley, as Kellogg's are not, and are therefore not gluten free.  Try something like these ones from Kallo.

The recipe is nearly identical to the original recipe you may remember from your childhood for rice krispies treats, but this has a wee added extra of some raspberry jam to pep it up!  If you don't fancy that then omit it and you'll have original flavour ones.

Check the marshmallows - some contain egg!  And if you want to make this vegan use veggy marshmallows, a near impossible feat in the UK without spending a fortune, but it can be done.

I like to decorate mine with a little dairy free chocolate and I love Moo Free, although its not guaranteed nut or soya free, so you may want to give it a pass.

Raspberry Mallow Crispies
Egg free, dairy free, gluten free and nut free

Ingredients

115g    marshmallows
55g      vegan margarine  I use Pure Spread Sunflower
4 tbsp   raspberry jam
140g    puffed rice cereal

Dairy free chocolate for drizzling if you fancy - watch out for nuts and soya in the chocolate though.

Method

Oil your Square Baker or Medium Bar Pan lightly to start with, with a nut free oil. (Or any baking tin about 23x23 cm)

1.  Put the marshmallows, vegan margarine and jam in a large saucepan and heat gently.  Stir constantly with a mix 'n scraper so it doesn't catch on the bottom and burn.

2.  Once everything has melted, bring to the boil for one minute, stirring all the time.

3.  Stir in the crispies and stir quickly until everything is well coated.

4.  Scrape the mix out of the pan and into the square baker, or medium bar pan for a shallower crispie.  Press down firmly with the back of the mix 'n scraper, wetted slightly to stop it sticking if you need to.

5.  Mark out your squares (I get 16 from the square baker and 24 from the medium bar pan).

6.  Leave to cool and place in the fridge for two hours to set.  Drizzle with a little dairy free chocolate if you wish, and cut into the squares with a nice sharp knife such as our Santoku knife.


7.  This stores well for three days in an airtight container.  I'm not sure about any longer as its always all eaten by then!

Sunday, 11 November 2012

Sticky Toffee Pudding (Vegan, Egg free and Dairy free)


I love a good sticky toffee pudding.  It is one of the staples of British menus and I quite often will choose it if it is on the menu in a restaurant.  I have had good and bad ones, and some truly awful ones!  For me it should not contain raisins, but should be heavy and toffee-like with the weight of the dates it contains. Although, it should also be light enough to make you want to eat more than two spoonfuls.

I found this recipe while searching for an egg and dairy free alternative for family Christmases, and then of course I had to tweak it! 

Ingredients

200g dates
250ml soya milk
100ml water
1 tsp bicarbonate of soda
115g vegan margarine (I use Pure Spread)
115g soft brown sugar
200g self raising flour
A few scrapings of fresh nutmeg
1/4 teaspoon ground ginger
1/4 teaspoon ground cinnamon

Toffee Sauce
100g golden syrup
200g soft brown sugar
150g vegan margarine
1 teaspoon vanilla extract
100ml soya cream

Method

1. Pre-heat the oven to 190°C

2. Chop the dates using a santoku knife on a cutting board and put them in a small saucepan.  Cover with the soya milk and water and simmer until the dates are soft.

3. Take the dates off the heat and stir in the bicarbonate of soda, which will froth as you add it to the date mixture. Leave to cool.

4. Beat together the margarine and sugar in a Classic Batter Bowl with a mix n scraper until pale.  Add the date mixture & stir in.

5. Measure the spices using an adjustable measuring spoon, and mix the spices into the flour. Sieve the flour and fold into the wet mixture.

6. Spoon the sponge mixture into a square baker (or a lined 20cm square tin).

7. Bake in the pre-heated oven for 30 minutes or until a cake tester comes out clean.  I usually listen to mine - is its still making little crackling noises give it a few more minutes!

8. To make the sauce, melt the syrup, margarine, sugar and vanilla extract in a small saucepan and simmer for 5 minutes without stirring. Leave to cool slightly and then stir in the soya cream with a mix n scraper.

9. Pour half the toffee sauce over the pudding. Serve with the rest of the sauce in a jug and add some dairy free ice cream. Fruit ice creams and sorbets work well too.


Based on the recipe from the Vegetarian Cookery School

Wednesday, 5 September 2012

Blueberry and Lemon Cupcakes (egg and dairy free, and vegan)

I have a complete obsession with all things lemony and have been wondering about how to make a lemon and blueberry cupcake for a while.  Then a thought; Why not adjust the lemon loaf cake and add blueberries?


So that is what I did this afternoon.  And Wow I'm glad I did.  Daughter number two ate two in quick succession and then asked for another!  (She didn't get another one in case you're worried about my parenting.)

Blueberry and Lemon Cupcakes

Ingredients

2 cups Self Raising Flour
1 cup Sugar
1 tsp Baking Powder
3/4 cup of fresh or frozen Blueberries
Zest & Juice of 1 Lemon
100ml Vegetable Oil
170ml Cold Water

Icing

1/3 cup Pure Spread
1/3 cup Trex
1 1/3 cups Icing sugar
1/3 cup blueberries

Method

Preheat the oven to 180°C

1. Measure out the flour and sugar using a measure all cup and add to a classic batter bowl.

2. Measure the baking powder using an adjustable measuring spoon and add to the bowl.

3. Zest the lemon with the Microplane zester, add to the flour and mix well with a stainless steel whisk to aerate.

4. Use the citrus press to squeeze the lemon into an easy read measuring cup,  and add to the bowl.

5. Add the oil and the water, measured in the easy read measuring cup, and mix thoroughly with a mix n scraper to make sure all is combined well.

6.  Fold in the blueberries.

7.  Spoon the better into twelve cupcake cases in the Muffin Pan and bake for 15-20 minutes until light golden brown. Poke one with your finger - if it bounces back nicely, its done!

8. Remove from the Muffin Pan and cool on a stackable cooling rack.

9. When cool, make the icing for the top. Put the blueberries in a pan and heat gently until the berries have burst and become nicely juicy.  Sieve the blueberries so you have just the juice and discard the skins.

10. Beat the Trex and Pure Spread together until fluffy, add in the icing sugar and one tablespoon of blueberry juice.  Beat until smooth, adding more blueberry juice as needed until you have a lovely smooth buttercream consistency.  Add a little water if you run out of juice and need more liquid.

11.  Ice using the Easy Accent Decorator with the small star nozzle fitted.  Top with extra blueberries if wished.

If you would like to do these gluten free, just sub in your favourite gluten free flour and about 1/2 tsp xanthan gum, and they turn out very nicely!

Sunday, 3 June 2012

Citrus Berry Trifle

Wow I've been busy the past few weeks and haven't had much time for blogging. 

I was on the Gardening Scotland stand all day on Saturday with some Pampered Chef colleagues and I made this trifle as a display piece.  I taste tested with my husband as I made it and will definitely be making it again as the trifle is now inedible after sitting on display.  So sad!


I also think I could have a good go at making this egg and dairy free, but I'll have to work on it...I'll get back to you once I've had a go.

In the meantime, here is the original Pampered Chef recipe.

Citrus Berry Trifle

Ingredients:

4-5  limes

175  g full fat soft cheese, softened

150  ml sweetened condensed milk

350  ml whipping cream or double cream, whipped to form soft peaks

450  g fresh berries such as strawberries, raspberries and blackberries or blueberries

450  g Madeira cake, cut into 2.5 cm cubes

600  ml (about 400 g) lemon sorbet

20  g flaked almonds, toasted

Additional fresh berries, to decorate (optional)


Directions:
1.  Slice 2 limes using Ultimate Mandoline fitted with v-shaped blade; set aside. Using Zester/Scorer, zest remaining limes; finely chop zest using Chef's Knife to measure 2 teaspoons zest. Juice limes into Easy Read Measuring Cup using Citrus Press to measure 125 ml juice.

2.  In Classic Batter Bowl, whisk together soft cheese, condensed milk, lime juice and lime zest using Stainless Whisk, until smooth and combined. Attach open star tip to Easy Accent® Decorator; fill with about one-third of the whipped cream and set aside. Gently fold remaining whipped cream into soft cheese mixture with Small Mix 'N Scraper®, until smooth; set aside. Slice strawberries with Egg Slicer Plus(TM). Place mixed berries in Small Batter Bowl.
3.  Cut Madeira cake into 2.5-cm cubes on Cutting Board using Bread Knife. To assemble trifle, place half of Madeira cake cubes into bottom of Trifle Bowl. Top with half of the lemon sorbet using Small Scoop or Medium Scoop; spread evenly. Top sorbet with half of the berries and half of the soft cheese mixture. Arrange lime slices in a circular pattern against inside of bowl to decorate. Repeat layers once with remaining Madeira cake cubes, sorbet, berries and soft cheese mixture.

4.  Pipe whipped cream rosettes around rim of trifle using decorator. Coarsely chop almonds using Food Chopper; sprinkle over top of trifle before serving. Decorate with lime slices and additional berries, if desired. Serve.

Yield: Serves 16

Per serving: Energy 1382 kJ/329 kcal; Protein 3.4 g; Carbohydrate 29.9 g; Fat 22.6 g; Saturated Fat 13.5 g; Fibre 0.6 g; Salt 0.4 g

Cook's Tip: Any flavour of sorbet, such as mango, raspberry, apricot or dark cherry can be used in this recipe, if desired.

Chilled fresh lemon mousse may be substituted for the lemon sorbet, if desired. Scoop and spread the mousse gently, taking care not to crush too much air out of the mousse.

© The Pampered Chef, Ltd. 2006
www.pamperedchef.com

Monday, 14 May 2012

Chocolate Chip Cookies (egg and dairy free/vegan)

Choc Chip cookies!  There is something about the crunch and chew factor of a choc chip cookie that comforts and makes me feel like I can face the world again when I'm feeling a bit down.  But they do have to be really good choc chip cookies to do that!

These ones fit into that category.

I use my favourite Dairy free chocolate for these - Moo Free chocolate drops which are a huge hit in our house.

These are based on a recipe from Kelly Rudnicki's Food Allergy Mama Baking Book.  I use a jar of baby food apple sauce as it is nice and smooth, often has nothing added, and is usually organic too.

I didn't have any the other day, so grated an apple into a pan (skin on) using my coarse microplane grater, added a little water and simmered it until it was nice and mushy.  One gala apple makes pretty much the amount you need for this recipe.


My big tip for making cookies all the same size, or cupcakes for that matter, is to use our large scoop to measure out the dough onto the baking stone, or the batter into the cupcake cases.  The means you get a uniform size of cookie or cake. Our small scoop is perfect for mini muffins or smaller cookies.


Vegan Choc Chip Cookies

Makes 12 cookies when using the large scoop

Ingredients
2/3 cup Pure Spread
1/2 cup brown sugar
1/2 cup granulated sugar
1 tsp vanilla extract
1 small jar baby applesauce (unsweetened) or 1/4 cup applesauce, mashed to remove lumps
1 3/4 cups plain flour
1/2 tsp bicarbonate of soda
1/2 tsp salt
3 packets Moo Free dairy free chocolate drops (or 105g vegan chocolate)

Method
1. Preheat the oven to 190°C

2. In a classic batter bowl, mix together the Pure Spread, brown sugar, granulated sugar, vanilla and applesauce with a mix 'n' scraper till smooth. I use a Measure all Cup to measure all of these ingredients out.

3. In a stainless mixing bowl combine the flour with the bicarbonate of soda and salt, measured using an adjustable measuring spoon, and whisk together with a stainless whisk.

4. Add mixtures together and combine until creamy. Stir in the chocolate chips.

5. Using a the large scoop drop the dough onto flat stoneware such as the medium round stone, medium bar pan or rectangular stone.  Flatten each cookie slightly.

6. Bake for 14-15 minutes or until lightly golden brown.

7. Leave to cool on the stone for a few minutes before removing with a large serving spatula to a stackable cooling rack.

Eat warm for best results!


Some little ones that I made this week for a childrens' birthday party, on our stackable cooling rack. I added the idea of lolly sticks which I cut in half with my fabulous professional shears and then inserted into the middle of the balls of dough before cooking.  These were made using the small scoop.


Saturday, 14 April 2012

Mrs Mac's Cake (egg and dairy free/vegan and can be gluten free)

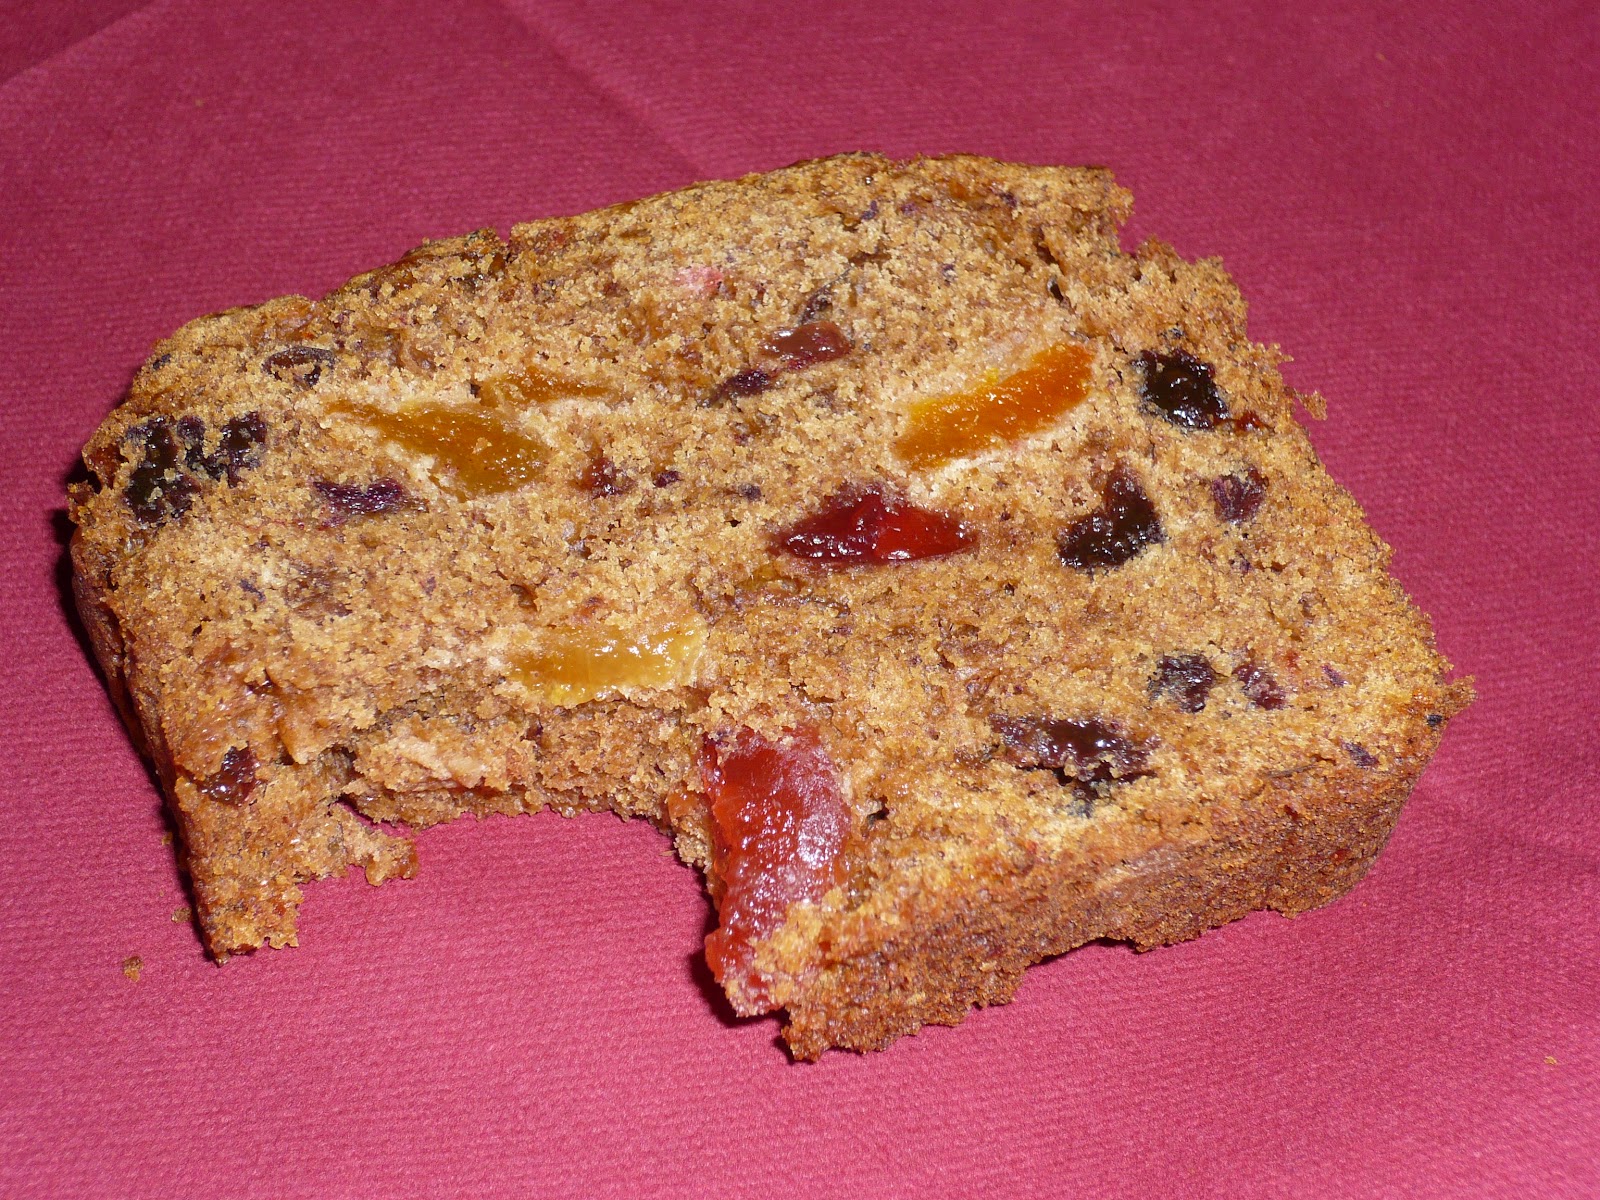
Fruit cake!
This is a family recipe that has been around a while and uses a traditional method of boiling the fruit to make them nice and moist.  My mum has been cooking it for ages and for some reason I always associate it with Easter.  Maybe its the fruit cake thing?

Anyway, as usual, with most family recipes, I've been trying different egg replacers to make it friendlier for our little person who is egg and dairy free.  I hate commercial egg replacers with a bit of a passion, and try everything else I can instead. This has been tried with half a banana in place of the one egg in the original recipe, but it did leave a bit of a banana flavour, which I wasn't keen on, so I tried apple sauce instead - bingo!

Then, because I'm lazy and I can't be bothered with the hassle of making apple sauce, I tried it with a jar of apple baby food - excellent!  And then I finally settled on grating an apple in with the fruit as they boil at the beginning, removing the need for the sauce at all! The boiling makes the fruit very moist and squishy and just delicious, and the apple just disappears into the mix.

You can make this GLUTEN free too, just substitute in gluten free flours (I like Dove's Farm) and add a 1/2 tsp xanthan gum to help it stick together - its a bit crumbly otherwise.

So here it is, my favourite fruit cake:


Mrs Mac's Cake

Ingredients

1 cup water
3/4 cup sugar
100g Pure spread or butter if not dairy free
2 cups mixed fruit (I like a mix of dried apricots, dates, raisins, sultanas and glace cherries but it works with anything.)

1 eating apple such as a gala (or 1 egg)

1 cup plain flour
1 cup self raising flour

1tsp bicarbonate of soda
1tsp cinnamon


Method

1. Measure out the water, spread, sugar and fruit in an easy read measuring cup.  Place them in a large pan. If using larger fruit like dates or apricots chop them up with the professional shears first.

2. Grate the apple into the pan with a coarse microplane grater. Like I said, I'm lazy so I don't even bother peeling it - extra fibre is good!

3. Heat until boiling.  Boil for five minutes stirring all the time with a mix n scraper.

4.  Leave to cool slightly. (If you are using the egg let this mix cool completely and then stir in the egg, remembering you don't need the apple earlier on)

5.  Meanwhile measure out the flours in a classic batter bowl and pre-heat the oven to 160°C.

6. Add the cinnamon and bicarbonate of soda to the mix in the pan using an adjustable measuring spoon, and stir well - the mix will fizz and bubble as in the photo below.

Bubbly fruit mix after adding the bicarbonate of soda

7.  Pour the wet ingredients into the flour and mix it all together.

8.  Pour into a stoneware loaf pan, or lined metal loaf pan and bake for about 1 hour.  Check it's done by pressing on the top of the loaf - if it bounces back nicely it is done. (I also listen to it!  If you can hear little crackles then chemical reactions are still happening and it may need a little longer!)

9.  Cool on a stackable cooling rack, and wait for it to be fairly cool before slicing - I know its difficult but if you cut into it too early it all crumbles and is a bit squooshy.  It keeps well for several days in an airtight container, and may even be better on day 2 and 3!  (If it lasts that long)


Sunday, 4 March 2012

Chicken, Tomato and Basil Flatbread

Chicken, Tomato and Basil Flatbread in the Medium Bar Pan, direct from the Pampered Chef Test Kitchens!
A recipe straight from The Pampered Chef test kitchens!  This is a fabulous dinner or lunch recipe and is quick and easy.  It uses a ready prepared pizza base mix but if you want to make your own then have a look here.

The mix of the chicken with fresh tomato and basil is lovely and fragrant and very tasty!

Ingredients

2 small vine-ripened tomatoes (about 100 g total weight)
2 tablespoons plus 1⁄2 teaspoon olive oil, divided
1 packet (145 g) pizza base mix
100–125 ml warm (hand hot) water
20 g pecan halves
50 g Parmigiano Reggiano cheese, divided
75 g Provolone Piccante cheese  (if you can't find this use cheddar!)
100 g skinless, boneless cooked chicken breast
2 teaspoons finely chopped fresh basil leaves
1 clove garlic, pressed
Preheat oven to 220°C/fan 200°C/Gas 7.

Method

1. Slice the tomatoes finely on a cutting board with the santoku knife. Line a plate with kitchen paper, place sliced tomatoes on lined plate and blot tops with kitchen paper; set aside.
2. Brush a Medium Bar Pan with 1⁄2 teaspoon olive oil using Chef’s Silicone Basting Brush and set aside.
3. Place pizza base mix in Stainless 4-Litre Mixing Bowl; add enough warm water to form a soft dough. Knead dough on lightly floured surface for about 5 minutes or until smooth.
4. Place pizza dough onto centre of prepared bar pan and roll the dough out to cover the base of the pan using a Baker’s Roller®. Set aside in warm place for 15 minutes.
5. Bake for 12–14 minutes or until golden brown.
6. Meanwhile, finely chop the pecans on a Cutting Board using the Food Chopper. 7. Grate Parmigiano Reggiano cheese using Microplane® Adjustable Fine Grater, and the Provolone or Cheddar with the Microplane® Adjustable Coarse Grater.
8. Dice the chicken using the santoku knife and chop the basil in the food chopper.
9. Combine pecans, half of the Parmigiano Reggiano cheese, 50 g of the Provolone cheese, the diced chicken, basil, garlic pressed with Garlic Press and remaining oil in Classic Batter Bowl; mix well using Small Mix ‘N Scraper®.
10. Remove the bar pan from the oven to Stackable Cooling Rack. Sprinkle baked base with remaining Parmigiano Reggiano cheese; top evenly with sliced tomatoes, chicken mixture and remaining Provolone cheese to within 5 mm of edge of base.
11. Bake for 6–8 minutes or until the cheese is melted. Remove from the oven. Cut flatbread into portions using Pizza Cutter; let it stand 2 minutes. Transfer to serving plates or napkins using Mini-Serving Spatula; serve warm.

Serves 12 as an appetizer

Nutrients per serving: Energy 769kJ/183kcal; Protein 8.7g; Carbohydrate 19.7g; Sugars 1.5g; Fat 8.3g; Saturated Fat 2.5g; Fibre 0.9g; Salt 0.5g

Tuesday, 7 February 2012

Cherry Scones

I made my little girl's birthday cakes this evening in preparation for Thursday.  Yes it does say cakes - there will be three! One for nursery, one for her birthday tea at home and one yet to be created for the party on Sunday when she has decided she wants a Barbie cake.  
On finishing and popping them in the oven I then realised there was nothing to show for my efforts to eat this evening! So I whipped up some scones too.  And here they are.  This is the recipe I have been using for ages and which makes light fluffy scones.  No egg as my little one has egg allergies and I make them with soya milk and vegan spread too.  So could you, if you want them to be vegan.

Tonight I tried out a tip I got from a fellow Pampered Chef consultant about using the Mix n Masher to rub in the butter rather than get my hands dirty!  Oh my goodness the revelation is amazing!  Not only does it make the most amazing mash but it does this job super quick.  And the scones were gorgeous too!

Ingredients

225g self raising flour
1 teaspoon baking powder
1/8 tsp salt (a pinch!)
2 teaspoons sugar
70g butter
150 ml milk
50g chopped glace cherries or sultanas, raisins etc

Method
Preheat the oven to 220°C

1.   Sift flour, baking powder and salt together in a classic batter bowl.
2.   Stir in sugar
3.   Use a Mix N Masher to "rub in" the butter till it resembles breadcrumbs (or use your fingers if you don't have one!)
4.   Add the cherries or other mixed fruit and stir.
5.   Make a well in the centre and slowly add the milk, (you may not need the full amount) mixing everything together gently with a mix n scraper.  The dough should be soft but not sticky.
6.   Pat the dough out gently on a floured surface to about 2.5cms (1inch) thick and cut into scones.
7.   Cook on a round stone or medium bar pan at the top of the oven for around 12-15 mins till golden brown. Cool on a wire rack and eat warm!