Showing posts with label gluten free. Show all posts

Sunday, 2 November 2014

Carrot and Courgette (Zucchini) Muffins

Its World Vegan Month in November.  Why not try these wee vegan cakes? No-one will believe that they are egg and dairy free!


Yum

We've had a huge amount of courgettes (we use the term courgette in the UK instead of zucchini) growing in our garden this year which has left me searching for new recipes to use them up. My favourites have been this lovely recipe from Alexx Stuart for Roast Zucchini and Basil Rosettes. And these amazing wee carrot and courgette muffins. The kids prefer the cakes! I've adapted Chloe Coscarelli's recipe for Maple Glazed Carrot Cupcakes from Chloe's Vegan Desserts, so they work beautifully as just carrot cupcakes (use 2 cups of grated carrots).

I've also made these as gluten free versions, and they work really well.  You may want to add a tiny bit more orange juice to make them as moist, as gluten free flour tends to absorb a little more liquid.

I make a batch of these every few weeks as they are so quick and moreish!

Carrot and Courgette (Zucchini) Muffins
(Egg free, dairy free, vegan and can be gluten free)

Ingredients

vegan carrot and zucchini muffins
1 cup sultanas
1 cup fresh orange juice
2 cups plain flour
3/4 cup of sugar
1 teaspoon baking powder
1/2 teaspoon bicarbonate of soda
1 teaspoon salt
1 teaspoon ground cinnamon
1/2 teaspoon ground mixed spice
1 cup peeled grated carrot
1 cup grated courgette (peel if old but if young leave on the skin)
1/2 cup oil
1 tablespoon cider apple vinegar


Method

Makes 18

Pre-heat the oven to 180°C, gas mark 4.

1. Measure out the orange juice and sultanas using the easy read measuring cups.  Place both in a small batter bowl to allow the sultanas to soak up some of the orange and become nice and plump and juicy.

2.  In a Classic batter bowl, add the plain flour and sugar. Then measure out the baking powder, bicarbonate of soda, salt, cinnamon and mixed spice using the adjustable measuring spoons and add to the classic batter bowl.  Use a stainless whisk to mix them together well and aerate the flour.

3. Peel and grate the carrot and courgette using a microplane course grater and add to the wet ingredients in the small batter bowl.

4. Measure out the oil and cider apple vinegar and add to the wet ingredients.  Stir with a mix n scraper.

5.  Add the wet ingredients to the dry in the classic batter bowl and mix with the mix n scraper until everything is combined.

6. Use the large scoop to measure out the mixture evenly into 18 cupcake wrappers in a stoneware 12 cup muffin pan or muffin pan.

7. Bake for 20 minutes or until golden brown on top.

8. Cool on a stackable cooling rack. Then watch them disappear in super quick time.


If you want to ice them a basic "butter" icing made with Pure spread and icing sugar and a few drops of lemon juice.  It tastes amazingly like cream cheese icing when added to the cakes.


Sunday, 20 April 2014

Alternative Easter Treats - Hot Cross Cookies (Egg Free, Dairy Free, Vegan and can be Gluten Free)

My blog has been getting a massive amount of hits in the past few weeks with people popping in to have a look at my Hot Cross Bun recipe which I posted two years ago.  I love it to bits but I reckoned it was time for a change this year.  So I've made Hot Cross Cookies instead!  I spotted a recipe for them in Good Housekeeping magazine, but it was completely unsuitable for my family, being full of eggs and butter, so I had a go at inventing my own based on the Good Housekeeping recipe and my favourite Chocolate Chip Cookie recipe, and they worked out pretty well...

To make these gluten free simply substitute in your favourite gluten free flour mix.  I tend to use Dove's Farm but have recently tried Bob's Red Mill and loved the texture.

Hot Cross Cookies (Egg Free, Dairy Free, Vegan and can be Gluten Free)

Makes 30 cookies when using the small scoop

Ingredients
2/3 cup Pure Spread
1/2 cup brown sugar
1/2 cup granulated sugar
1 tsp vanilla extract
1 small jar baby applesauce (unsweetened) or 1/4 cup applesauce, mashed to remove lumps
1 3/4 cups plain flour
1/2 tsp bicarbonate of soda
1/2 tsp salt
1/4 heaped tsp mixed spice
1/2 cup sultanas
1/2 cup raisins
1/4 cup mixed peel

Icing
3 tbsp icing sugar
2 tsp water


Method
1. Preheat the oven to 190°C

2. In a classic batter bowl, mix together the Pure Spread, brown sugar, granulated sugar, vanilla and applesauce with a mix 'n' scraper till smooth. I use a Measure all Cup to measure all of these ingredients out.

3. In a stainless mixing bowl combine the flour with the bicarbonate of soda, salt and mixed spice, measured using an adjustable measuring spoon, and whisk together with a stainless whisk.

4. Add mixtures together and combine until creamy. Stir in the raisins, sultanas and peel until well mixed.

5. Using a small scoop drop the dough onto flat stoneware such as the medium round stone, medium bar pan or rectangular stone.  Flatten each cookie slightly with the heel of your hand or a spoon dipped in a little water to stop it sticking. Make sure you leave spreading space between each cookie as they do like a bit of extra room!

6. Bake for 10-12 minutes or until lightly golden brown. Cook a tiny bit longer if you like your cookies on the crispy rather than chewy side.

7. Leave to cool on the stone for a few minutes before removing with a large serving spatula to a stackable cooling rack.

8. Once cooled, ice a small cross one each biscuit using water icing in a squeezy bottle with a small plain nozzle from the decorator bottle set.


Sunday, 21 July 2013

Apple Crumble cupcakes (Gluten free, egg free, dairy free, nut free, soya free and vegan!)

These cupcakes were created as an entry for a Pampered Chef competition for their consultants. The challenge was to make a cupcake that could be cooked for Party Hour which is a super quick show and allows guests and host to enjoy a Pampered Chef show even if they are pushed for time.  I went for an allergy free cupcake as I feel that the recipe should be available to as many people as possible, and just because you have an allergy doesn't mean you shouldn't have a cupcake!

Don't be put off by the list of ingredients. It may seem a lot but it is just a bit of repetition in the crumble topping, and dairy free, egg free cooking needs a bit of extra oomph sometimes!

Apple Crumble Cupcakes #eggfree #dairyfree #glutenfree #nutfree #soyfree #vegan www.mypamperedlifeuk
 Crumble Topping
¾ cup Gluten free self raising flour
½ cup brown sugar
½ tsp ground cinnamon
1/8 tsp salt
1/3 cup vegan margarine, melted

Cupcakes
1 ½ cups Gluten free self raising flour
½ cup sugar
1 tsp baking powder
¼ tsp ground cinnamon
¼ tsp salt
½ cup rice milk
½ cup vegetable oil
1 tsp apple cider vinegar
1 tsp vanilla extract
2 apples
100g Jar Apple Sauce, divided into 2 tbsp and 12 tsp

Icing
4 tbsp icing sugar
1 tbsp water
Ready rolled white icing

1.   Preheat the oven to 180°C.  Place cupcake cases in the 12-cup Muffin PanInto the 2L Stainless Mixing Bowl, measure out the Crumble topping ingredients using an Easy Read Measuring Cup and the Adjustable Measuring Spoon teaspoon.  Mix together with two forks until the topping is crumbly and has small lumps in it. Set aside.

2.   Into the 4L Stainless Mixing Bowl measure out the flour, sugar, baking powder, cinnamon and salt. In a Small Batter Bowl whisk together the milk, oil, vinegar, 2 tbsp apple sauce, and vanilla using a Stainless Whisk, until frothy.

3.   Wedge the apples with the Apple Wedger and then chop into fine chunks with a FoodChopper. Add to the flour mix.

4.   Pour the wet mix into the dry flour mixture and mix until just together with a Mix N ScraperQuickly Scoop into the paper cases using a Large Scoop.
Sprinkle the crumble topping over the cupcakes and press down slightly to make it stick.  Bake for 12-15 minutes until golden brown. 

5.   Meanwhile prepare the icing by mixing the icing and water together and scooping into a Decorator Bottle with the round nozzle attached.  Use the apple cutter from the Creative Cutter Set stamp out 12 apple shapes from the ready rolled icing.

6.   Remove cupcakes from the oven and leave to sit for a few minutes before removing from the stone.

7.   Carefully remove the cupcakes from the stone (see chef’s tip) and place on Stackable Cooling Rack.  While the cupcakes are still warm you can drizzle icing over in random patterns, add a teaspoon of apple sauce to the top of each one and place an apple shape on the top.

Chef’s Tip: Use a micro scraper to ease the cupcakes out of the wells without spilling too much crumble topping everywhere.
If you don't want to top with the apple shape then simply add the drizzled icing and stop there.

Sunday, 31 March 2013

Caravan Biscuits for the holidays! (Dairy free, egg free, vegan and can be gluten free)

vegan, gluten free, oat caravan biscuits

This recipe is the result of my mum clipping recipes in the 1970's.  She is pretty sure this one originally came from the fabulous people at Good Housekeeping, and its served us well over the years!  (We don't know why they are called Caravan biscuits though! Any ideas, please let me know?)

These biscuits, or cookies if you prefer, are slightly crunchy, chewy in the middle and full of knobbly oaty bits.  Naturally vegan with the use of vegan margarine, they can also be gluten free if you use gluten free flour and add a 1/4 tsp xanthan gum.

Chuck a few handfuls of raisins or chopped cherries in and you have fruity, oaty biscuits, and boy are they good!

Caravan Biscuits 

Makes 20

Ingredients

120g plain flour
1/2 tsp baking powder
large pinch salt
large pinch cream of tartar
120g vegan margarine (I use Pure Spread Sunflower)
120g sugar
120g rolled oats
1 level tsp bicarbonate of soda (baking soda)
2 tsp hot water
2 tablespoons syrup


Method

Preheat the oven to 180°C

1. Sift the flour, baking powder, salt and cream of tartar together and set aside.

2. Beat the margarine to soften in a classic batter bowl and add the sugar. Beat in.
3. Add the oats and stir to combine.

4. Dissolve the bicarbonate of soda in the hot water in a pinch bowl.

5. Warm the syrup slightly then measure it out using a measure all cup.

6. Add to the margarine and sugar mix. Beat in.

7. Add the flour and mix until well combined.

8. If the mixture is very solid you can warm it slightly in the microwave to make it easier to handle, and then form small balls. If too warm leave it to cool slightly before you handle it.

9. Place on flat stoneware (I used my rectangle stone, and my medium stone) and flatten slightly with the palm of your hand.

10. Bake at 180°C for 8-10 minutes until lightly golden. Don't let them get too dark of they will be bitter!

11. Allow to cool slightly on the trays before removing to a cooling rack.


Sunday, 14 October 2012

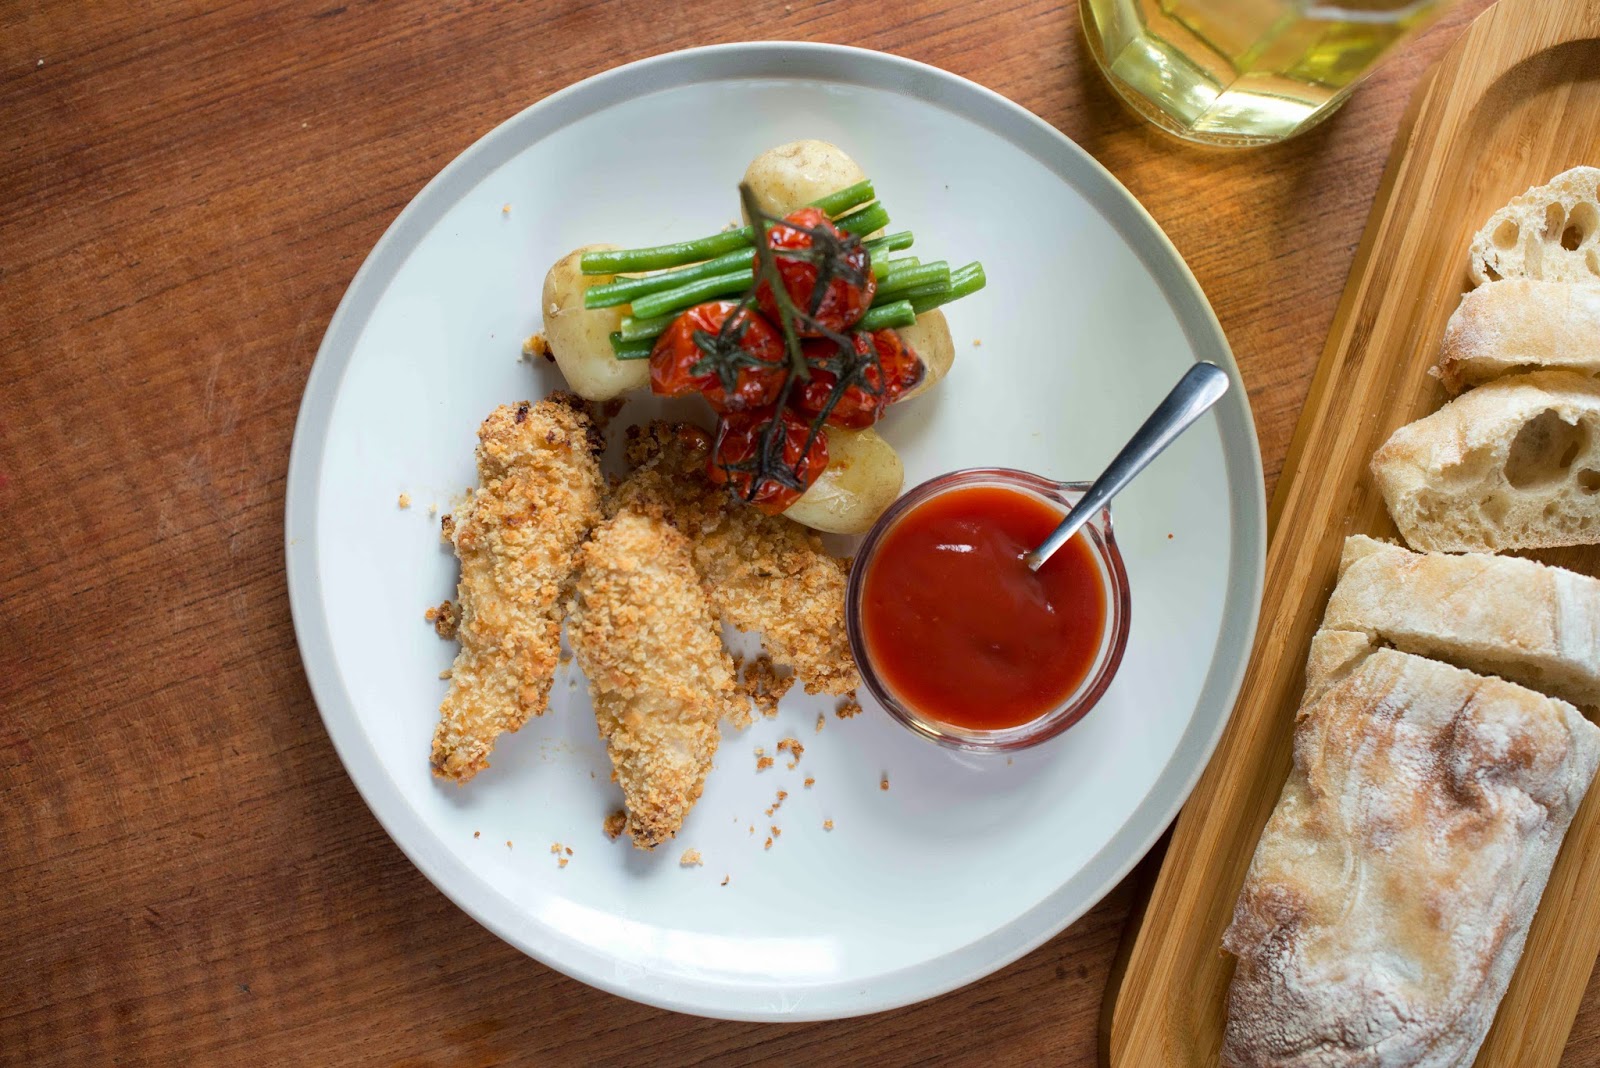
Chicken goujons (egg, dairy and gluten free)


My mum makes fantastic home made chicken goujons, or nuggets if you like.  I taste them and I'm transported back to my childhood, and a few amazing picnics when she made these and we took them along cold and dipped them in sauce to eat them with our fingers.

Having a little person with egg and dairy allergies makes the use of eggs to coat them really difficult. I went on a mission to find out how to make them for her (and us) without the addition of eggs so that we could have a happier and healthier alternative to chicken nuggets.

The fact that these are made at home means that the coating can be controlled and made gluten and wheat free too, depending on the flour or bread used for the breadcrumbs.  So I reckon you could make these pretty much allergy free!

I use this method to make home made fish fingers too.

Serves 4

Ingredients

400g pack chicken breast strips or breasts cut into even sized strips or chunks
3 tablespoons plain flour (or corn flour if GF)
2 tablespoons oil
4 tablespoons non-dairy milk (I use soya)
Two ends of a loaf of bread (use any bread you like, gluten free if needed)

Method


Preheat the oven to 180°C

1.  Place the bread in a food processor and whizz until the bread is fine breadcrumbs.

2.  Put the oil and milk in a small batter bowl and whisk until well mixed and frothy with a stainless steel whisk.

3.  Put the flour on one plate and bread crumbs on another.


4.  Coat each chicken strip well by rolling it in the flour, then transfer to the oil and milk emulsion and coat well in that too.

5.  Place the strips on the breadcrumb plate and coat in the breadcrumbs by turning and patting them on.

6.  Place the chicken on a flat stone such as a medium bar pan (you'll need two of these) or a rectangle stone, and cook in the oven for 25-30 mins until golden brown.  You could fry these, but I find as they already contain oil in the coating they bake really well.


7.  I serve these with chips or mash, peas, and plenty of sauces for dipping.  My family particularly like sweet chilli sauce.


Thank you to HCampbellPhotography for the truly beautiful food shots!


Saturday, 16 June 2012

Vegan lemon cake

I LOVE lemons and citrusy tastes and have been experimenting with vegan lemon cakes for a while.  This one has a lovely clean taste to it, not interfered with in any way.  I've felt others have been oddly "muddy" with the addition of other ingredients to substitute for the eggs. Here the lemon juice itself does the job by activating the baking powder and making everything light and fluffy.

One of these doesn't last long in our house!

You can make these with gluten free flour (I've done it by just subbing in Dove's Farm self raising with nothing else added as their mix already has xanthan gum in it).

Another option is little cupcakes.  One batch of batter will make you 12 normal sized cupcakes.  Bake these for about 18 minutes.


Ingredients

2 cups Self Raising Flour
1 cup Sugar
1 tsp Baking Powder
Zest & Juice of 1 Large Lemon (reserve 2 teaspoons of juice for the icing)
100ml Vegetable Oil
170ml Cold Water

Icing
1 cup Icing Sugar
2 tsp reserved lemon juice (plus a little water if needed)

Method

Preheat the oven to 200°C

1. Measure out the flour and sugar using a measure all cup and add to a classic batter bowl.

2. Measure the baking powder using an adjustable measuring spoon and add to the bowl.

3. Zest the lemon with the Microplane zester, add to the flour and mix well with a stainless steel whisk to aerate.

4. Use the citrus press to squeeze the lemon into an easy read measuring cup, reserve two teaspoons for the icing,  and add to the bowl.

5. Add the oil and the water, measured in the easy read measuring cup, and mix thoroughly with a mix n scraper to make sure all is combined well.

6. Pour into a stoneware loaf pan or lined loaf pan and bake for 30 minutes until fully cooked. Check it's cooked by listening to it - put your ear up close and if it's making little crackly-pop noises it could take a few more minutes. Or poke with your finger - if it bounces back nicely, its done!

7. Remove from the loaf pan and cool on a stackable cooling rack.

8. When cool, make the icing for the top. Sieve the icing sugar and stir in lemon juice and drops of water until the consistency is wet enough to spread over the cake.

TIP:  If your lemons are small use the juice of one and a half in the cake and the rest for the icing.  My lemons seem to have been organic Monsters recently!

Thank you to The Ethical Chef for the inspiration and original recipe.

Saturday, 14 April 2012

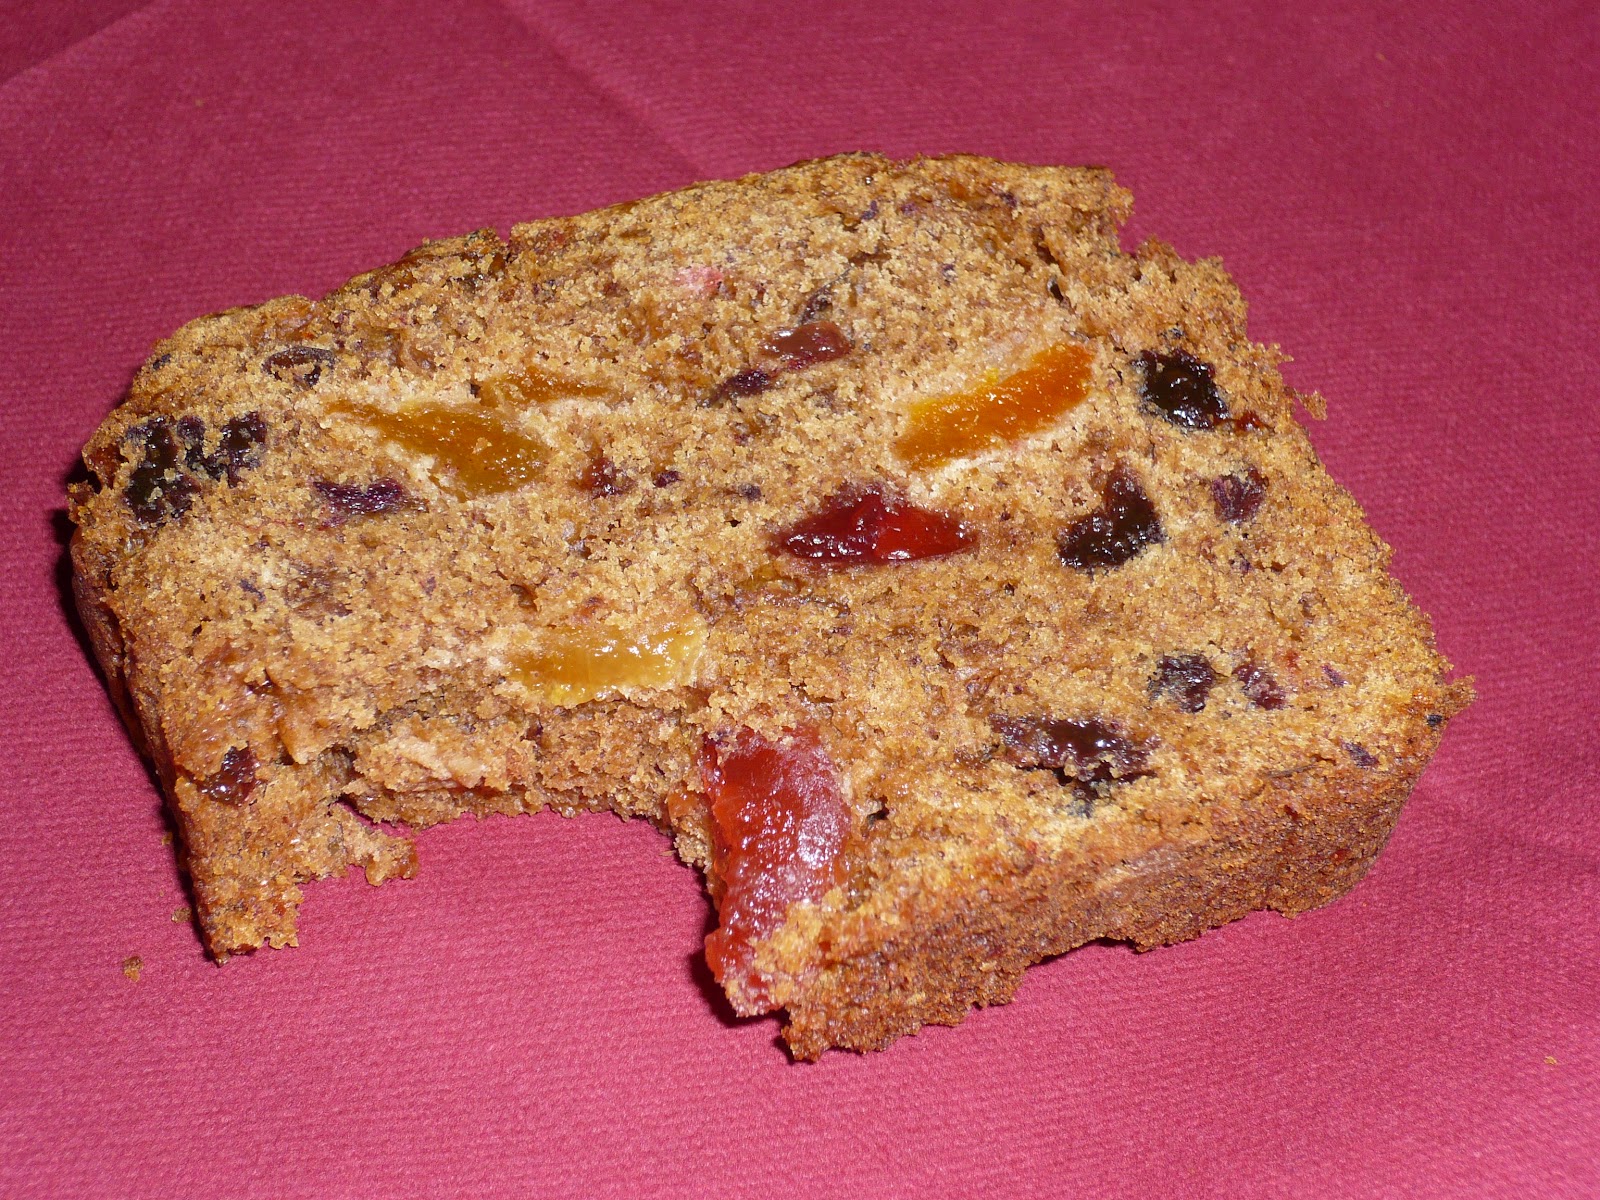
Mrs Mac's Cake (egg and dairy free/vegan and can be gluten free)

Fruit cake!
This is a family recipe that has been around a while and uses a traditional method of boiling the fruit to make them nice and moist.  My mum has been cooking it for ages and for some reason I always associate it with Easter.  Maybe its the fruit cake thing?

Anyway, as usual, with most family recipes, I've been trying different egg replacers to make it friendlier for our little person who is egg and dairy free.  I hate commercial egg replacers with a bit of a passion, and try everything else I can instead. This has been tried with half a banana in place of the one egg in the original recipe, but it did leave a bit of a banana flavour, which I wasn't keen on, so I tried apple sauce instead - bingo!

Then, because I'm lazy and I can't be bothered with the hassle of making apple sauce, I tried it with a jar of apple baby food - excellent!  And then I finally settled on grating an apple in with the fruit as they boil at the beginning, removing the need for the sauce at all! The boiling makes the fruit very moist and squishy and just delicious, and the apple just disappears into the mix.

You can make this GLUTEN free too, just substitute in gluten free flours (I like Dove's Farm) and add a 1/2 tsp xanthan gum to help it stick together - its a bit crumbly otherwise.

So here it is, my favourite fruit cake:


Mrs Mac's Cake

Ingredients

1 cup water
3/4 cup sugar
100g Pure spread or butter if not dairy free
2 cups mixed fruit (I like a mix of dried apricots, dates, raisins, sultanas and glace cherries but it works with anything.)

1 eating apple such as a gala (or 1 egg)

1 cup plain flour
1 cup self raising flour

1tsp bicarbonate of soda
1tsp cinnamon


Method

1. Measure out the water, spread, sugar and fruit in an easy read measuring cup.  Place them in a large pan. If using larger fruit like dates or apricots chop them up with the professional shears first.

2. Grate the apple into the pan with a coarse microplane grater. Like I said, I'm lazy so I don't even bother peeling it - extra fibre is good!

3. Heat until boiling.  Boil for five minutes stirring all the time with a mix n scraper.

4.  Leave to cool slightly. (If you are using the egg let this mix cool completely and then stir in the egg, remembering you don't need the apple earlier on)

5.  Meanwhile measure out the flours in a classic batter bowl and pre-heat the oven to 160°C.

6. Add the cinnamon and bicarbonate of soda to the mix in the pan using an adjustable measuring spoon, and stir well - the mix will fizz and bubble as in the photo below.

Bubbly fruit mix after adding the bicarbonate of soda

7.  Pour the wet ingredients into the flour and mix it all together.

8.  Pour into a stoneware loaf pan, or lined metal loaf pan and bake for about 1 hour.  Check it's done by pressing on the top of the loaf - if it bounces back nicely it is done. (I also listen to it!  If you can hear little crackles then chemical reactions are still happening and it may need a little longer!)

9.  Cool on a stackable cooling rack, and wait for it to be fairly cool before slicing - I know its difficult but if you cut into it too early it all crumbles and is a bit squooshy.  It keeps well for several days in an airtight container, and may even be better on day 2 and 3!  (If it lasts that long)


Tuesday, 21 February 2012

Banana cakes (Egg free, dairy free and gluten free!!)


This is a little post for some of my friends I know are unable to indulge in the usual way due to allergies and intolerances.  It can be so difficult not to be able to eat a cake at the same time as everyone else, or to have to think about where everything that you put in your mouth came from.  You have to be highly organised and able to put up with not eating while you watch others enjoying food around you.  I'm becoming a bit of a specialist in catering for the out there requirements, and this is one of my fail safe recipes that can be used for almost anyone with allergies.  


Not gluten free?  Then it works just as well with ordinary self raising, and you don't need eggs or butter either!  Bonus!


Dieting?  There's about 145 cals in one cake (12 bun tin) and 6g fat but the fat is all the oil so hardly any saturated fat at all!

Naked banana cakes cooling down!


Ingredients

120g sugar
80ml sunflower or vegetable oil
½ ripe banana
150g gluten free self raising flour
6 tbsp water

Method

Preheat the oven to 170°C

1.  Beat oil and sugar together in a classic batter bowl with a mix n scraper.
2.  Mash the half banana and beat into sugar mixture. 
3.  Add flour and water and mix well.  The consistency should be like a normal cake batter.  If not add a little more water.
4.  Fill a 12 cup muffin pan with paper liners or a 24 cup mini muffin pan and divide the mixture between the papers.
5.  Cook for about 12 to 15 minutes, then remove from the oven and cool on a cooling rack.
6.  Ice with icing made with pure spread and icing sugar or water icing.  You  could use our lovely decorator bottle set to make them look pretty!  Or how about a dairy free chocolate button on the top of a mini one before it cools down completely so the button melts a bit - yummy!

To make this into a big cake just double the mixture and split between two 8inch cake tins.  Sandwich together with jam and ice as above.


Tip: Don't know what to do with half a banana? Eat it or stick it in the freezer for next time! It looks pretty yucky because the skin goes black but it works brilliantly in cakes. I always bung my slightly past it bananas in the freezer to use at a later date if I'm not baking at the time. Not often, but it does happen.


Based on a recipe from Doves Farm flours