Saturday, 26 January 2013

Apple and Ginger Rolls (can be dairy free/egg free, vegan)


January is always difficult isn't it?  I try to be good, but weather, work and general blah after the holidays always seem to conspire against me.

Here is a recipe thats a little bit of nice, but not too naughty, especially if you serve it with something like fat free frozen yoghurt or IceDelight my favourite dairy free frozen treat!

I made mine dairy free by using vegan pastry dough (Jus-Rol Filo is vegan) and using Pure Spread not butter for the final brush.  I also used soya based cream cheese Tofutti instead of the Philadelphia.

Don't be put off by the complicated sounding rolling bit!  Its just like filling a fajita!  I should have taken blow by blow photos really; I promise some soon!

Ingredients

2.5cm piece peeled fresh ginger
2 large Granny Smith apples, peeled
1/4 cup granulated sugar
2 tsp cornflour
1/4 tsp ground cinnamon
60g reduced-fat cream cheese (Philadelphia) softened
10 sheets (9 x 14 in./23 x 35 cm) thawed frozen Filo pastry
Oil to moisten the dough
1 tbsp butter, melted
Icing sugar (optional)

Method

1. Preheat the oven to 200°C. Grate ginger using Microplane® Adjustable Fine Grater to measure 2 tsp.

2. Use the apple wedger to core and wedge the apples. Coarsely chop apples with Food Chopper.

3. Combine ginger, apples, granulated sugar, cornflour and cinnamon in Classic Batter Bowl; mix well using Small Mix ‘N Scraper®.

4. Microwave on HIGH for 3-–4 minutes or until thickened and bubbly; stir. Cool for 5 minutes. Add cream cheese and mix well.

5. Lay one sheet of the filo on Cutting Board and brush with silicone basting brush with oil or use a Kitchen Spritzer filled with your choice of oil to spray the dough. Fold filo in half crosswise. Cut folded sheet in half lengthwise, leaving folded edge intact. Spoon a rounded 1 tbsp of the filling to within 2.5 cm of folded edge of filo using Adjustable Measuring Spoon, leaving a 2.5 cm border on each side. Lift folded edge of filo up over filling, tucking filo tightly around filling. Fold sides of filo in toward center; gently roll up.
Repeat with remaining filo and filling.

6. Place rolls, seam sides down, onto Medium Bar Pan or other flat stone; lightly brush with melted butter using Chef's Silicone Basting Brush. Bake for 12–-14 minutes or until rolls are golden brown. Remove from oven to Stackable Cooling Rack. Sprinkle with icing sugar, if desired.

Yield: 10 servings of 2 rolls

Nutrients per serving:

Calories 100, Total Fat 2.5 g, Saturated Fat 1.5 g, Cholesterol 5 mg, Carbohydrate 19 g, Protein 2 g, Sodium 80 mg, Fiber 1 g


Cook's Tips:

Keep filo sheets covered with cling film while working on recipes to keep them from drying out. Wrap any leftover filo tightly with cling film and store in refrigerator for up to 2 weeks or freeze for up to 2 months.

Tuesday, 4 December 2012

A Christmas recipe for Candy Cane Brownie Pops


Don't these look lovely!  These are a Pampered Chef recipe, but I've managed to make a dairy free and egg free version too.

The recipe VEGAN style (egg and dairy free) looks exactly the same but I use my favourite egg and dairy free Brownie recipe then use vegan chocolate such as this Moo Free Chocolate and make sure my candy canes were egg and dairy free too (most of them are just sugar and colourings/flavourings!). Hurrah! 

Pampered Chef Recipe for Candy Cane Brownie Pops

Ingredients
1 package (18-21 oz or 450 g) fudge brownie mix (plus ingredients to make brownies) or your favourite brownie recipe
24  candy canes
10 oz (300 g) chocolate cake covering or chocolate
Additional decorations such as red sprinkles

Directions
1.  Line Medium Sheet Pan with a 33-cm piece of greaseproof paper. Prepare brownie mix according to package directions; pour batter into pan. Bake 30 minutes or until wooden pick inserted in center comes out with moist crumbs attached. Remove from oven to Stackable Cooling Rack; cool 20 minutes or until still slightly warm.
2.  Meanwhile, cut off straight ends of candy canes to form 4 1/2-in. (11-cm) sticks using Utility Knife. Place candy cane tops into resealable plastic bag and crush using a rolling pin; set aside.
3.  Using a Large Scoop, scoop brownie into 24 scoops, packing brownie into scoop using hands. (Entire brownie will be used.) Roll brownie scoops into smooth balls. Insert candy cane sticks into centers of balls, mounding brownie around stick.
4.  Place chocolate into Small Batter Bowl; microwave according to package directions until melted and smooth. Spoon melted chocolate evenly over each brownie ball, turning to coat completely. Allow excess chocolate to drip off. Dip into reserved crushed candy canes or additional decorations (see Cook 's Tips) and stand upright on a piece of Parchment Paper. Repeat with remaining chocolate, lollipops and crushed candy. Let stand until set. Place into miniature cupcake liners.

Yield:
24 servings of 1 lollipop
Nutrients per serving:
Calories 260, Total Fat 11 g, Saturated Fat 4 g, Cholesterol 20 mg, Carbohydrate 40 g, Protein 2 g, Sodium 75 mg, Fiber 1 g

Cook's Tips:
While still slightly warm, the fudgy brownie rolls easily into balls. Although the edges of the brownie are crusty, they do not need to be discarded. Simply scoop the edges along with the center, and they will soften as they stand.

Wrap lollipops in cellophane, tie with ribbon and use as table décor, place settings or take-home party favours for a special holiday touch.


Sunday, 25 November 2012

White Chocolate Festive Fudge

Here we go, a recipe direct from Pampered Chef, and as promised to many people at the Haddington Christmas Market today!
Ingredients:

1   orange
400g   white chocolate, chopped
200ml  sweetened condensed milk
100g  coarsely chopped toasted pecans, divided
75g  sweetened dried cranberries, divided
85g  coarsely chopped dried apricots, divided
1  tsp Vanilla Extract


Directions:
  1. Line Small Sheet Pan with a piece of Parchment Paper, allowing about 1 in. (2.5 cm) to extend past sides. Zest orange with Microplane® Adjustable Fine Grater to measure 2 tsp. Place chocolate and condensed milk in Large Micro-Cooker®; microwave on HIGH 2-3 minutes or until chocolate is mostly melted, stirring every minute. Stir until chocolate is completely melted. Add 75g of the chopped pecans, and half each of the cranberries and apricots, all of the orange zest and vanilla; mix well.
  2. Spoon chocolate mixture evenly over parchment; spread evenly using Large Spreader. Top fudge with remaining pecans, cranberries and apricots; press lightly. Refrigerate several hours or until firm.
  3. Lift parchment and fudge from pan. Cut into squares. Store in tightly covered container in refrigerator up to 3 weeks. (Do not freeze.)
Yield: 30 servings
Nutrients per serving: Calories 120, Total Fat 7 g, Saturated Fat 3 g, Cholesterol 5 mg, Sodium 20 mg, Carbohydrate 14 g, Fiber 1 g, Protein 2 g
Cook's Tips: For a perfect party favor or place setting, place fudge in a Simple Additions® Petite Square. Wrap with cellophane, tie with a ribbon and a gift tag.

Any combination of nuts and dried fruit would work well in this recipe

I left the nuts out for the one I made for the fair today and it was pretty fabulous.  I did add in a little more apricots and cranberries to make up for it.

Sunday, 11 November 2012

Sticky Toffee Pudding (Vegan, Egg free and Dairy free)


I love a good sticky toffee pudding.  It is one of the staples of British menus and I quite often will choose it if it is on the menu in a restaurant.  I have had good and bad ones, and some truly awful ones!  For me it should not contain raisins, but should be heavy and toffee-like with the weight of the dates it contains. Although, it should also be light enough to make you want to eat more than two spoonfuls.

I found this recipe while searching for an egg and dairy free alternative for family Christmases, and then of course I had to tweak it! 

Ingredients

200g dates
250ml soya milk
100ml water
1 tsp bicarbonate of soda
115g vegan margarine (I use Pure Spread)
115g soft brown sugar
200g self raising flour
A few scrapings of fresh nutmeg
1/4 teaspoon ground ginger
1/4 teaspoon ground cinnamon

Toffee Sauce
100g golden syrup
200g soft brown sugar
150g vegan margarine
1 teaspoon vanilla extract
100ml soya cream

Method

1. Pre-heat the oven to 190°C

2. Chop the dates using a santoku knife on a cutting board and put them in a small saucepan.  Cover with the soya milk and water and simmer until the dates are soft.

3. Take the dates off the heat and stir in the bicarbonate of soda, which will froth as you add it to the date mixture. Leave to cool.

4. Beat together the margarine and sugar in a Classic Batter Bowl with a mix n scraper until pale.  Add the date mixture & stir in.

5. Measure the spices using an adjustable measuring spoon, and mix the spices into the flour. Sieve the flour and fold into the wet mixture.

6. Spoon the sponge mixture into a square baker (or a lined 20cm square tin).

7. Bake in the pre-heated oven for 30 minutes or until a cake tester comes out clean.  I usually listen to mine - is its still making little crackling noises give it a few more minutes!

8. To make the sauce, melt the syrup, margarine, sugar and vanilla extract in a small saucepan and simmer for 5 minutes without stirring. Leave to cool slightly and then stir in the soya cream with a mix n scraper.

9. Pour half the toffee sauce over the pudding. Serve with the rest of the sauce in a jug and add some dairy free ice cream. Fruit ice creams and sorbets work well too.


Based on the recipe from the Vegetarian Cookery School

Sunday, 14 October 2012

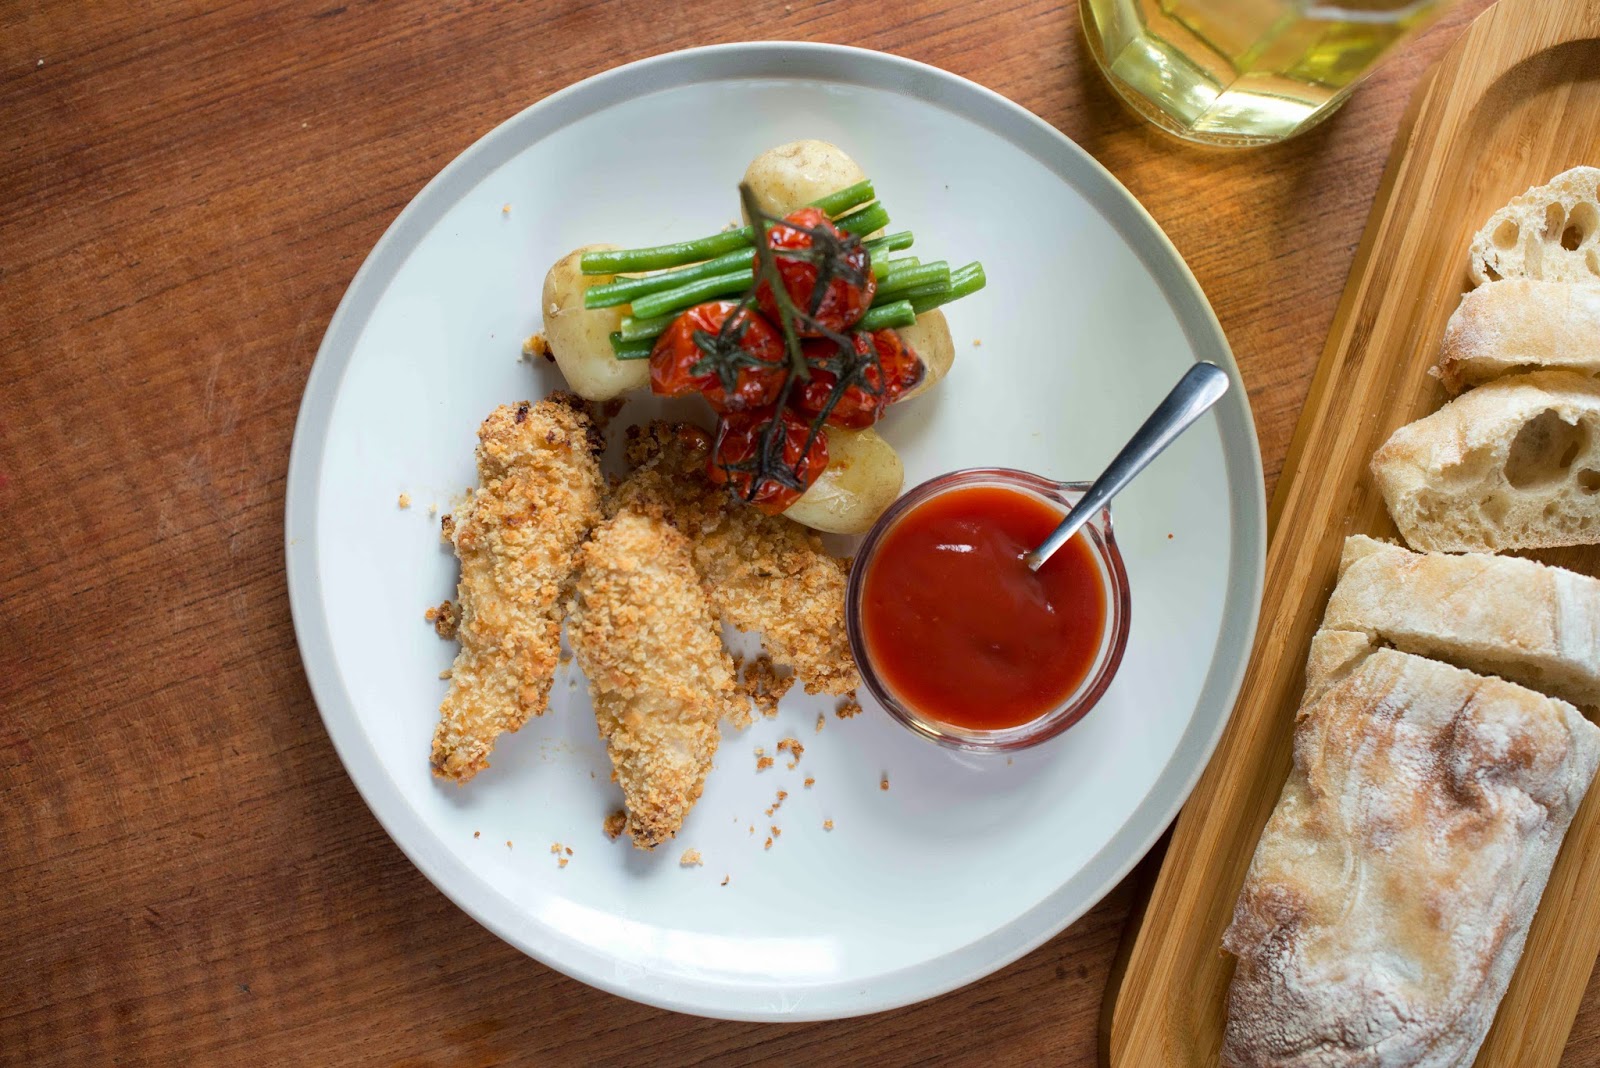
Chicken goujons (egg, dairy and gluten free)


My mum makes fantastic home made chicken goujons, or nuggets if you like.  I taste them and I'm transported back to my childhood, and a few amazing picnics when she made these and we took them along cold and dipped them in sauce to eat them with our fingers.

Having a little person with egg and dairy allergies makes the use of eggs to coat them really difficult. I went on a mission to find out how to make them for her (and us) without the addition of eggs so that we could have a happier and healthier alternative to chicken nuggets.

The fact that these are made at home means that the coating can be controlled and made gluten and wheat free too, depending on the flour or bread used for the breadcrumbs.  So I reckon you could make these pretty much allergy free!

I use this method to make home made fish fingers too.

Serves 4

Ingredients

400g pack chicken breast strips or breasts cut into even sized strips or chunks
3 tablespoons plain flour (or corn flour if GF)
2 tablespoons oil
4 tablespoons non-dairy milk (I use soya)
Two ends of a loaf of bread (use any bread you like, gluten free if needed)

Method


Preheat the oven to 180°C

1.  Place the bread in a food processor and whizz until the bread is fine breadcrumbs.

2.  Put the oil and milk in a small batter bowl and whisk until well mixed and frothy with a stainless steel whisk.

3.  Put the flour on one plate and bread crumbs on another.


4.  Coat each chicken strip well by rolling it in the flour, then transfer to the oil and milk emulsion and coat well in that too.

5.  Place the strips on the breadcrumb plate and coat in the breadcrumbs by turning and patting them on.

6.  Place the chicken on a flat stone such as a medium bar pan (you'll need two of these) or a rectangle stone, and cook in the oven for 25-30 mins until golden brown.  You could fry these, but I find as they already contain oil in the coating they bake really well.


7.  I serve these with chips or mash, peas, and plenty of sauces for dipping.  My family particularly like sweet chilli sauce.


Thank you to HCampbellPhotography for the truly beautiful food shots!