Saturday, 14 April 2012

Mrs Mac's Cake (egg and dairy free/vegan and can be gluten free)

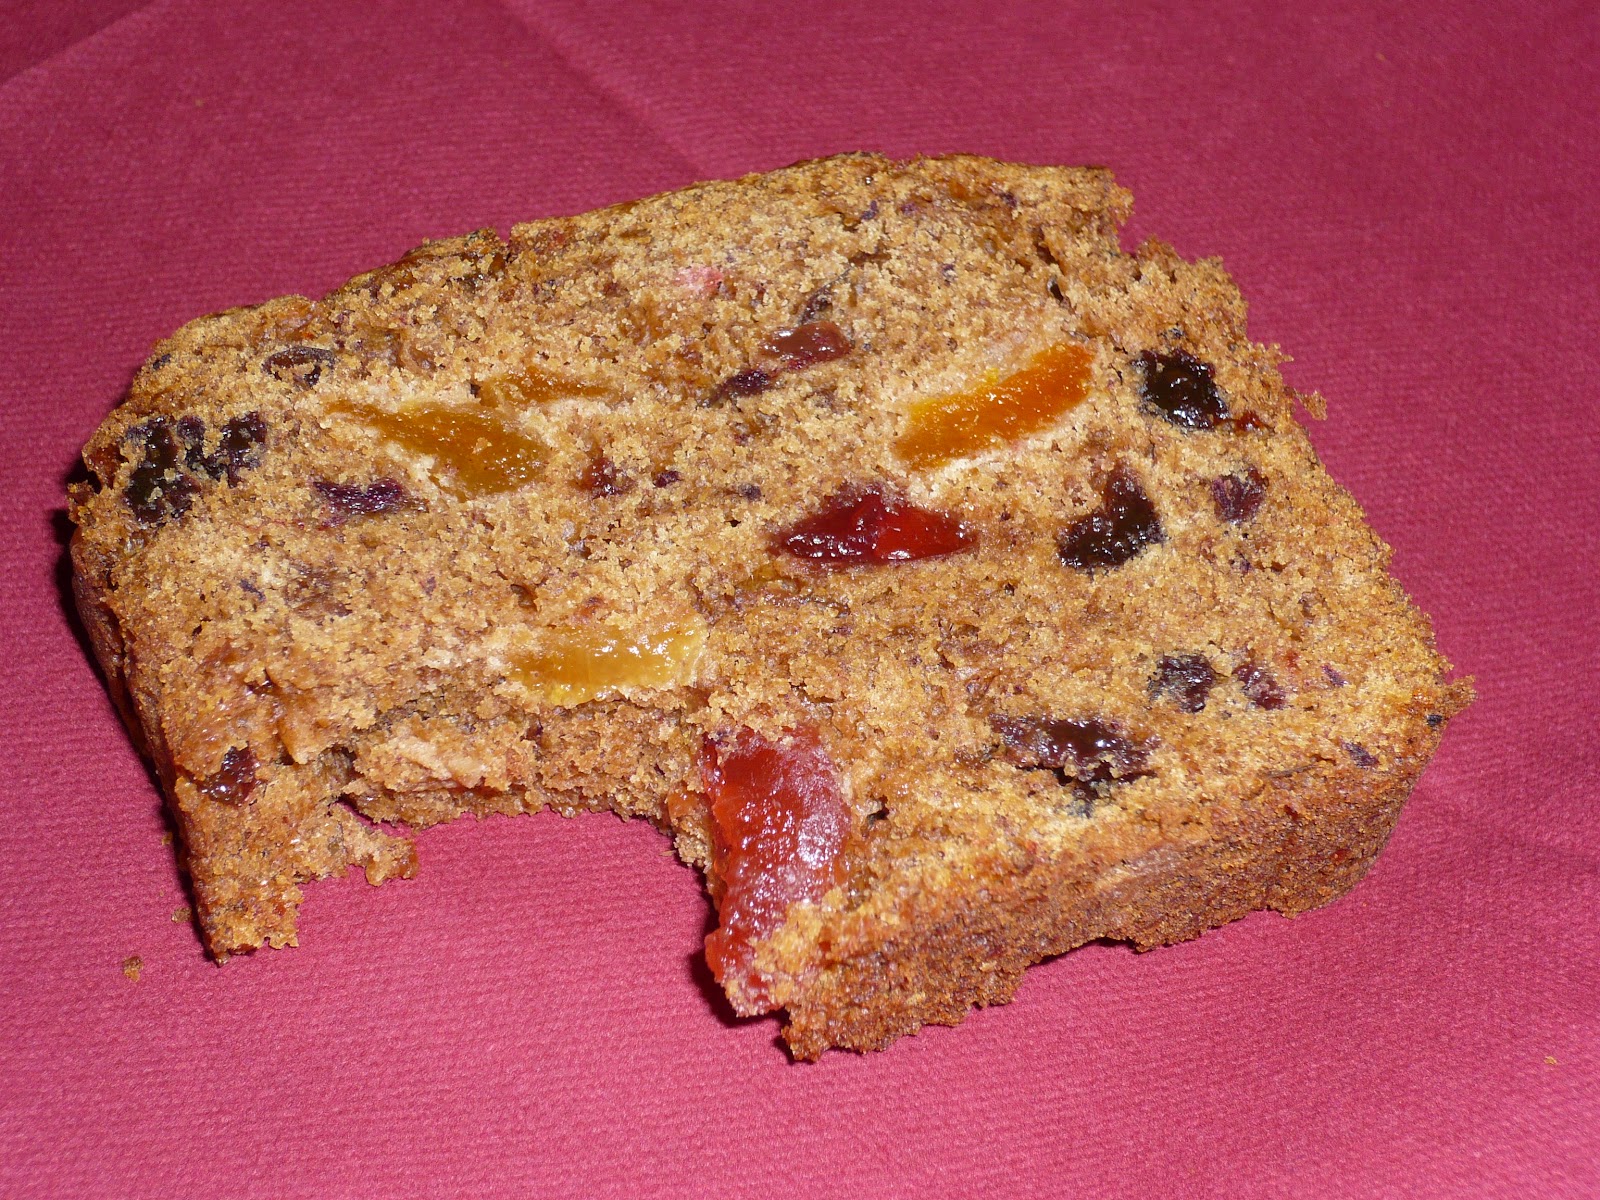
Fruit cake!
This is a family recipe that has been around a while and uses a traditional method of boiling the fruit to make them nice and moist.  My mum has been cooking it for ages and for some reason I always associate it with Easter.  Maybe its the fruit cake thing?

Anyway, as usual, with most family recipes, I've been trying different egg replacers to make it friendlier for our little person who is egg and dairy free.  I hate commercial egg replacers with a bit of a passion, and try everything else I can instead. This has been tried with half a banana in place of the one egg in the original recipe, but it did leave a bit of a banana flavour, which I wasn't keen on, so I tried apple sauce instead - bingo!

Then, because I'm lazy and I can't be bothered with the hassle of making apple sauce, I tried it with a jar of apple baby food - excellent!  And then I finally settled on grating an apple in with the fruit as they boil at the beginning, removing the need for the sauce at all! The boiling makes the fruit very moist and squishy and just delicious, and the apple just disappears into the mix.

You can make this GLUTEN free too, just substitute in gluten free flours (I like Dove's Farm) and add a 1/2 tsp xanthan gum to help it stick together - its a bit crumbly otherwise.

So here it is, my favourite fruit cake:


Mrs Mac's Cake

Ingredients

1 cup water
3/4 cup sugar
100g Pure spread or butter if not dairy free
2 cups mixed fruit (I like a mix of dried apricots, dates, raisins, sultanas and glace cherries but it works with anything.)

1 eating apple such as a gala (or 1 egg)

1 cup plain flour
1 cup self raising flour

1tsp bicarbonate of soda
1tsp cinnamon


Method

1. Measure out the water, spread, sugar and fruit in an easy read measuring cup.  Place them in a large pan. If using larger fruit like dates or apricots chop them up with the professional shears first.

2. Grate the apple into the pan with a coarse microplane grater. Like I said, I'm lazy so I don't even bother peeling it - extra fibre is good!

3. Heat until boiling.  Boil for five minutes stirring all the time with a mix n scraper.

4.  Leave to cool slightly. (If you are using the egg let this mix cool completely and then stir in the egg, remembering you don't need the apple earlier on)

5.  Meanwhile measure out the flours in a classic batter bowl and pre-heat the oven to 160°C.

6. Add the cinnamon and bicarbonate of soda to the mix in the pan using an adjustable measuring spoon, and stir well - the mix will fizz and bubble as in the photo below.

Bubbly fruit mix after adding the bicarbonate of soda

7.  Pour the wet ingredients into the flour and mix it all together.

8.  Pour into a stoneware loaf pan, or lined metal loaf pan and bake for about 1 hour.  Check it's done by pressing on the top of the loaf - if it bounces back nicely it is done. (I also listen to it!  If you can hear little crackles then chemical reactions are still happening and it may need a little longer!)

9.  Cool on a stackable cooling rack, and wait for it to be fairly cool before slicing - I know its difficult but if you cut into it too early it all crumbles and is a bit squooshy.  It keeps well for several days in an airtight container, and may even be better on day 2 and 3!  (If it lasts that long)

Sunday, 8 April 2012

Triple layer chocolate cake (dairy and egg free/vegan)

I'm having a wee bit of a love affair with Isa Chandra Moskowitz and Terry Hope Romero, the authors of my current favourite recipe book Vegan Cupcakes take over the World.  They are amazing vegan cooks and have produced one of the best cupcake recipe books I've come across.  This is a Triple Layer Chocolate Cake based on their basic chocolate cupcake recipe which was the first recipe I tasted from the book and which blew me away!
 
Its been a busy Easter weekend and I baked this for my Hubby and Brother in law's birthday celebrations yesterday.  Happy Birthday guys! xx
 

Ingredients
2 cups soy milk
2 teaspoon apple cider vinegar
1 1/2 cups granulated sugar
2/3 cup vegetable oil
3 teaspoons vanilla extract
2 cups plain flour
2/3 cup cocoa powder (I currently use Asda's own brand)
1 1/2 teaspoons bicarbonate of soda
1 teaspoon baking powder
1/4 teaspoon salt


Icing

130g Pure Spread
70g Trex
400g Icing sugar
3 tbsp soya milk
1 1/2 tbsp cocoa powder

To decorate:
Dairy free chocolate chips (I used Moo Free which are AMAZING!)

Method


1. Preheat oven to 180°C and line three 6 1/2 inch (16 1/2cm) cake tins with baking paper. Run a little dairy free spread or oil around the edges to prevent sticking.

2. Measure out the soy milk in an easy read measuring cup, and place in a classic batter bowl. Measure the vinegar using an adjustable measuring spoon and whisk together with the soy milk using a stainless whisk, and set aside for a few minutes to curdle. (This is home made dairy free buttermilk)

3. Measure out the flour, cocoa powder, bicarbonate of soda, baking powder, and salt using the easy read measuring cups and adjustable measuring spoon.  Sift together in a separate stainless mixing bowl. (Or if you are lazy like me use your whisk to remove lumps while mixing it all together.)

4. Add the sugar, oil and vanilla extract to the soy milk mixture and beat with the whisk until foamy.

5. Add the flour mix slowly to wet ingredients and beat with your whisk until no large lumps remain (a few tiny lumps are okay).


6. Pour into the tins, putting slightly less in one of them, to be the middle layer.  Bake for 20-25 minutes, until a toothpick inserted into the center comes out clean. Transfer to a stackable cooling rack, tip upside down, remove tins and baking paper and turn right way up to cool completely.

7.  Once the cake is cooled cut off any high spots to even out the base and middle layer, and make up the icing without the cocoa powder:  Cream the Pure and Trex together until smooth in a stainless mixing bowl with a mix n scraper then add the milk and icing sugar and beat hard for a couple of minutes until smooth.

8. Spread the bottom layer of cake with icing, add the middle layer and spread icing on this too. Add the cocoa powder to the remaining icing and beat well.  Spread this over the top of the cake with a large spreader and decorate with dairy free choc chips or dairy free smarties.


Thank you to Carolyn Figg a fellow Pampered Chef consultant for the Trex magic!

Friday, 6 April 2012

Apple, sultana and cinnamon hot cross buns (egg free, dairy free, vegan)

Hot Cross Bun Tear and Share Style on the Medium Round Stone
Normally I take my time and add in lots of links to the products but I have several people champing at the bit for this one so here it is!

This can be vegan or not depending on whether you use the dairy free spread or butter and what kind of milk you use.  I got the inspiration for the tear and share style from a magazine last month, but I can't remember where!  And I based my recipe on one from Baking Mad.

Ingredients
625 g strong white bread flour
7g sachet fast action yeast
75g sugar
pinch salt
2 tsp ground allspice/mixed spice
2 tsp cinnamon
50 g Pure spread or butter
250ml milk (any kind you fancy!  I used soya milk)
125ml water
1 large bramley apple
125g sultanas (UPDATE!  Having eaten several I'd add more sultanas! Maybe double it to 250g?)

For the crosses:
6tbsp plain white flour
4tbsp water

For the glaze:
2tbsp sugar
2tbsp water

Method

1. Place the flour, yeast, sugar and salt in a classic batter bowl and stir together with a mix n scraper.

2. Measure out the spices using an adjustable measuring spoon and mix into the flour.

3. Melt the fat with half of the milk in a small pan, add the remaining cold milk and 125ml cold water, so that the liquid is luke warm.

4. Pour it into the flour mixture and mix in.

5.  Peel the apple, cut and core it with the apple wedger and then chop it into tiny pieces in the food chopper.

6. Add the sultanas and finely chopped apple to the dough and knead firmly for 10 minutes (or 5 minutes in a mixer with a dough hook or on the pizza dough setting in a breadmaker) until the dough is smooth and elastic.

7. Turn the dough onto a lightly floured work surface, divide it in two and then roll one half into a long sausage, cut into 10 equal pieces. And repeat with the next one, cut into 9 pieces.

8. Pinch the edges of each piece of dough up to the centre until you have a smooth ball, turn seam side down on the worktop and roll into a smooth ball.

9. Place the buns on a medium round stone allowing space for them to double in size. I used a concentric circle pattern with one in the middle, six around it and then 12 one the outside ring.  I lined up every second one on the outside ring with the inner ring and then put one in the space.  Hope that makes sense?


10. Cover with oiled cling film and leave in a warm place until the dough has doubled in size and is sticking together (see below).  I left mine about an hour.

11. When to dough is almost ready, preheat the oven to 180°C. Mix the plain flour with enough water to make a paste of a similar consistency to butter icing in a small prep bowl.

12. Place the paste in a plastic bag and snip the end off, then pipe crosses on the hot cross buns. I did a large line across the centre one and then smaller ones radiating out.  I then made a couple of rings all the way round to give the spider web effect. (Thanks to a fellow consultant Pauline, who suggested using the Easy Accent Decorator for this bit - probably less messy than the bag!)


13. Bake for 20 to 22 mins until the buns are golden and firm.

14. To glaze dissolve 2 tbsp caster sugar in 2 tbsp water, boil for a minute then brush over the hot buns with a silicone basting brush as soon as they come out of the oven to give a shiny glaze.

15.  Leave to cool slightly then enjoy with spread, jam, nutella, or naked, whatever you fancy!


Friday, 30 March 2012

Rock buns and Easter holidays

I can't wait!  The Easter holidays are nearly upon us and I've been on countdown this week.  With this in mind I've got a child friendly recipe for you that can be ready pretty quickly and always is a hit.

Do you remember rock buns as a child?  I always remember making them at nursery as a child for some reason! 

Later on as a nursery teacher they were a favourite with my little people too, and now my own children love them.  I always used to use the traditional Bero recipe which usually worked a treat, unless a certain member of staff got a go at the baking and then they really were ROCK buns!  You could bounce them off the walls!  I never did figure out what she was doing wrong.

This one won't be bounce-able and will be light and fluffy (unless you are THAT member of staff!).

I have to work without eggs in my kitchen so I've fiddled about until I got a fab light texture and enough sultanas/raisins to balance it out.  Hope you like them?

(Have you been to like my facebook page yet?  The first prize draw takes place on Saturday 31st March and you have to be in it to win it!)

egg free and dairy free rock buns in the sun, as we enjoy all this lovely weather outside in the garden


Rock Buns (egg free, dairy free and vegan)

Ingredients

250g self raising flour
90g sugar
90g butter or Pure Spread (for those who are non dairy)
100g sultanas or raisins or a mix of dried fruit.
3-4 tablespoons of milk (whatever kind you like)

Method

1. Preheat the oven to 190°C

2. Measure the flour into a classic batter bowl and stir in the sugar with a mix n masher.

3. Add the butter or spread and using a mix n masher blend it all together till you get breadcrumbs.  Or use your fingers and get rubbing - the children love this bit.

4.  Stir in the dried fruit.

5.  Add enough milk with an adjustable measuring spoon to make a soft but not sticky dough.

6.  Divide the mixture into roughly 12 heaps on a rectangle stone or any other flat stone/tray and cook for around 8-10 minutes until they are a light golden colour.

7.  Remove to a stackable cooling rack and eat either warm or cold.  These are best eaten on the day they are made, but honestly don't last long anyway! 

Friday, 23 March 2012

Mini gingerbread cupcakes (vegan) and a Prize Draw

As a child I remember going to Woolies at the weekend with my parents and being allowed a treat in the cafe.  My all time favourite was a slice of gingerbread with a layer of smooth white glace icing on the top.  Super spicy and warming and then the icing creating the foil for the taste buds, giving it a sweet and zingy tang at the same time.


My camera was playing up so the photos are not great today, but I'll make some more and post better photos later. (These yummy little tastes of ginger heaven have all been eaten already!)


I've carried that taste with me into adulthood, and never quite found it again.  I came close with Delia's recipe for ginger cake with lemon icing in her How to Cook book (and it is absolutely divine), but this is the recipe that most matches up to the taste sensations I remember.


These gingerbread muffins are made in the Pampered Chef deluxe mini muffin pan, and are based on the gingerbread cupcakes in Vegan Cupcakes Take Over the World.  If you have never come across the wonders that are contained in this book, I'd give it a go NOW and be blown away by how fabulous the recipes are even if you're not a vegan.

I've fiddled with the recipe as usual, because I just can't leave them alone, and I have them just the way I like them.  Unfortunately it means I'm likely to eat about four in a row.  They are just little bites of heaven. 

As usual if you aren't worrying about dairy or keeping this vegan it works fine with cows milk and plain yoghurt.

This makes about 36 mini cupcakes (I haven't managed to perfect it to make the 24 yet!)  Or you could make a few big ones in a separate tray too. The recipe makes 12 perfectly sized big muffins in the stoneware muffin pan too.

If you fancy a prize draw for a piece of the kit used to make this recipe then come along and like my facebook page to be entered into the prize draw on 31st March 2012. If you share your love for the page on Facebook with your friends and they come and like too, and mention your name, then you'll be entered again!  Get referring!


Ingredients

1 1/4 cups plain flour
1 tsp baking powder
1/2 tsp bicarbonate of soda
3 tsp ground ginger
1 tsp ground cinnamon
pinch (1/8tsp) mixed spice
1/4 tsp salt
1/2 cup vegetable oil
1/4 cup soya milk
1/3 cup treacle
1/2 cup golden syrup
2 tablespoons soy yoghurt
1 1/2 tsp lemon zest
2 pieces of crystallized ginger


Method

1. Preheat the oven to 180°C and line the deluxe mini muffin pan with paper liners.

2. Measure the flour in an easy read measuring cup and put in a classic batter bowl.

3.  Measure out the baking powder, bicarbonate of soda, ginger, cinnamon, mixed spice and salt with the adjustable measuring spoons, add to the bowl, and mix with a stainless whisk.

4.  Using the easy read measuring cup measure the oil and soya milk and place in a separate bowl.  I use my small batter bowl.

5. To measure the treacle and syrup I use my measureall cup which allows you to get at every last drop of the sticky stuff and not waste any. Put this in the bowl with the oil and soya milk

6.  Add the yoghurt and grate in the zest of the lemon with a microplane zester.

7.  Mix together with the whisk until this forms a lovely silky, gloopy, treacly, smelling liquid.

8. Chop up the crystallized ginger with a food chopper using it with the lid on to contain it all. Add to the mix.

9.  Add the wet ingredients to the dry and mix well with the stainless whisk.  The batter will be very runny - that is okay!

10.  Now pour into the waiting paper cases.  You can be much more accurate if you use a Pampered Chef small scoop as it is the perfect size for the mini muffin pan and will give you cupcakes that are all exactly the same size. Very professional looking.

11.  Cook for about 15 mins until a knife comes out clean.  Transfer to a cooling rack and cool completely before icing.

12. Ice using plain white icing made with water and icing sugar, or add some lemon juice for a zesty alternative.  I like them with an extra little bit of crystallized ginger too.